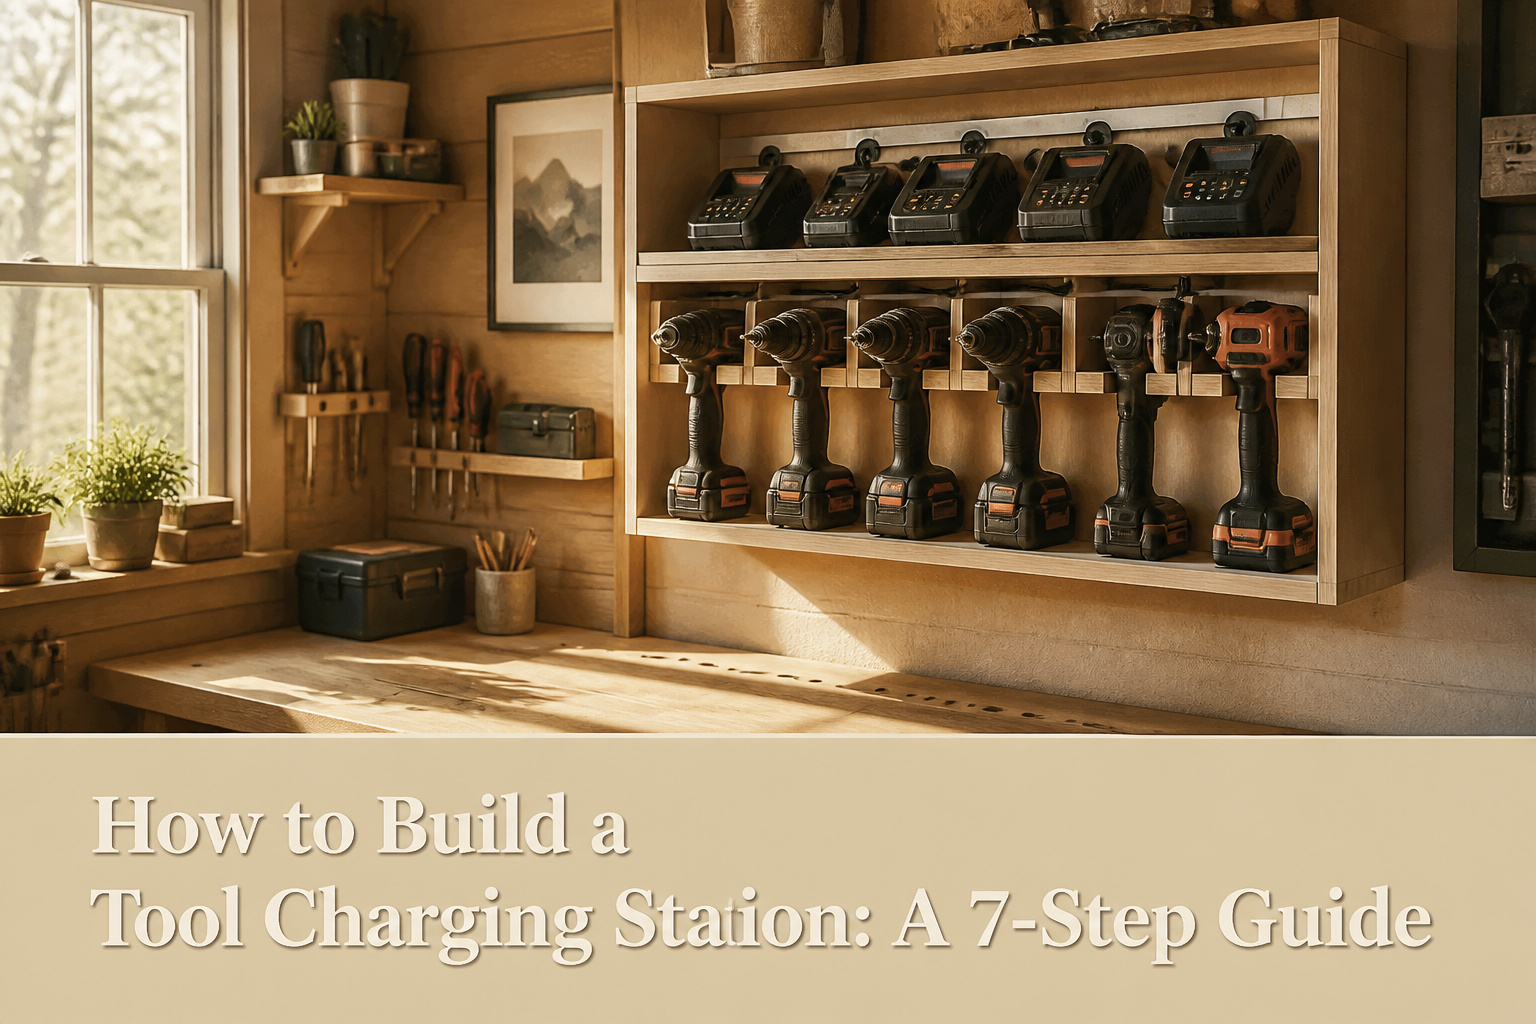
A tool charging station is a wall-mounted or freestanding cabinet that organizes battery chargers, hides their cords in a concealed chase, and keeps tools within arm’s reach. The catch is that most first-time builders cut their plywood pieces on different days and end up with a frame that racks and sits crooked for years. The fix is simple: cut the back, top, and sides at the same time, and check each cut for square with a framing square before you move on.
Materials and Tools
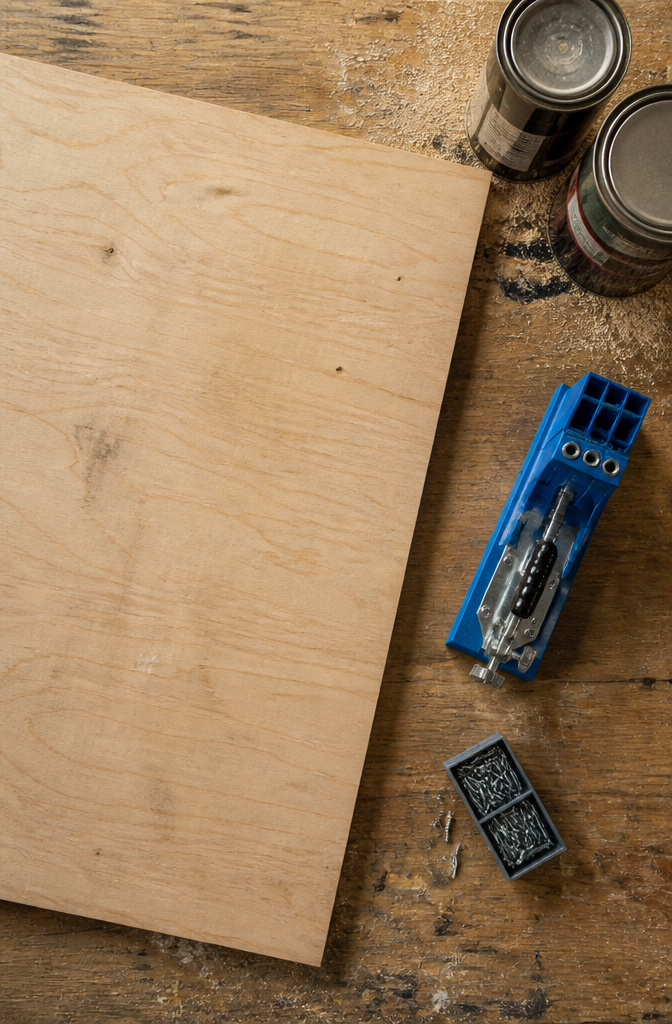
A charging station takes daily abuse from heavy batteries sliding in and out, so the plywood matters more than it looks. I go with 3/4" plywood, either one 60" x 60" sheet or two pieces at 3/4" x 30" x 60", because anything thinner starts to sag under a loaded drill within a year. The 3/8" plywood some plans use for backing is lighter but I skip it for shop builds; the weight savings is not worth the rattle.
For fasteners, Kreg pocket hole screws are the move. They pull joints tight without showing hardware, which counts when the station sits open on a wall. A Kreg K4 Pocket Hole Jig makes the angled holes repeatable; the newer 720 works too if you already own it.
The power side needs a heavy-duty power strip, not the beige bargain from the junk drawer. Look for something rated for workshop draw, with enough spacing between outlets for those bulky battery chargers. I ran a Tripp Lite with individually controlled outlets in my last build, and being able to kill the drill charger without unplugging the light was worth the extra ten dollars.
Tools are straightforward: a circular saw or table saw for breaking down the sheet, plus a drill. A straightedge guide helps if your circular saw skills are still developing.
Design the Station
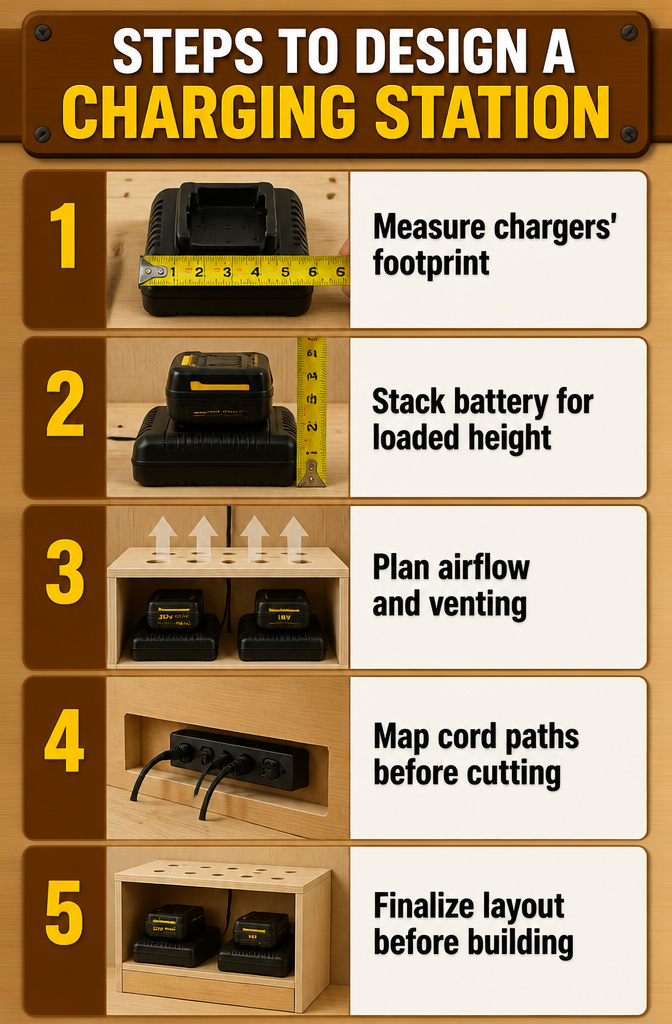
Chargers come in more sizes than the tools themselves, so the first move is to measure the ones you actually own. Lay each charger flat and note its footprint, then stack a battery on top and measure again; that loaded height is the minimum clearance your compartment needs. Depth matters just as much, since a charger with a battery sticking out front-to-back needs a deeper shelf than one that loads from above. The MWA Woodworks build leaves the compartment open for this reason, and most plans worth following sketch the layout before buying a single sheet of plywood.
Airflow is the part that is easy to pencil in and painful to forget. A closed cabinet traps heat from the charging cycle, so leave at least an inch of open space above each battery and consider venting the top or back if your shop runs warm. Cord paths should be solved on paper, not with a jigsaw mid-build. The Kreg plan routes everything through a concealed chase behind a false wall, and that decision has to happen before you cut shelf holes or drill the bottom panel for the power strip.
What sets it apart from a simple shelf is the concealed chase for routing and hiding the power cords for a nice clean look.
That chase takes almost no material, just a quarter sheet of plywood and a few screws, but it only works if you planned for it. Map where each cord enters, where the power strip sits, and how much slack lives behind the false wall before you make any cuts permanent.
Cut the Plywood
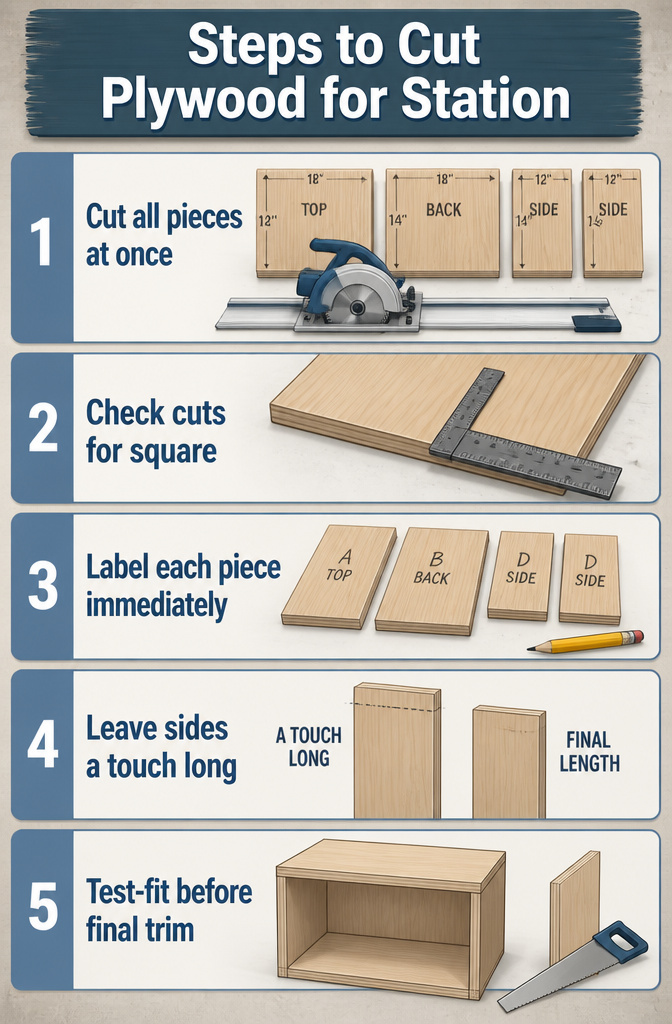
- One afternoon in the shop, I finally learned why my first charging station sat crooked for two years. The back, top, and sides had been cut on different days, and the 12-inch depth matched on none of them. Now I cut all box pieces at the same time so widths and lengths stay uniform through assembly.
- A circular saw with a rip guide works for most of this, though a table saw saves setup if you have one. Either way, check your cuts for square as you go. A framing square against the edge takes ten seconds and saves twenty minutes of fudging later.
- Label every piece immediately. "Piece A" for the top, "B" for the back, "D" for the sides. The five seconds with a pencil beats hunting through identical rectangles while glue is drying. I leave the sides a touch long and trim to final length after test-fitting; that wiggle room has rescued me more than once.
Drill Pocket Holes
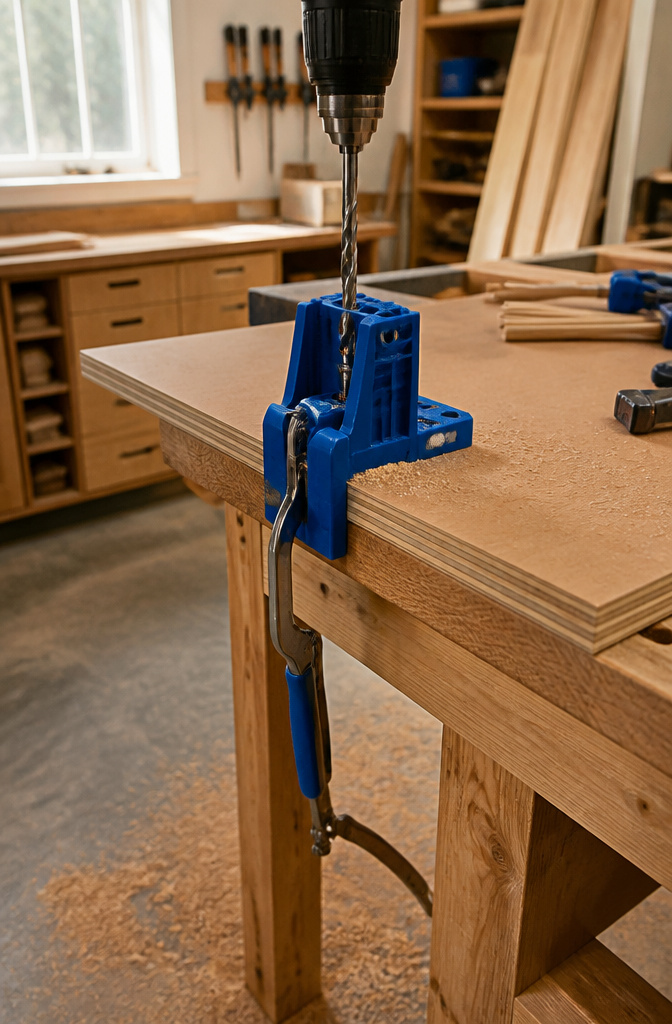
Pocket holes are what keep this frame from racking once the chargers and batteries start sliding in and out. The Kreg K4 Pocket Hole Jig handles 3/4" stock cleanly if you set the stop collar to the 3/4" mark and the drill guide to match. Set both before you cut anything, because a jig bumped out of alignment mid-project is how you end up with holes that pull the joint open instead of tight.
Placement matters more than count. The back panel and both shelves want holes drilled on their underside faces so the screws bite into the vertical sides without showing through. Mark each location with a pencil and square before you line up the jig, working from the same face on every piece so the angled holes all point the same direction. Inconsistent orientation is what twists a frame out of square; the screw pulls toward whatever angle the hole was drilled, and mixed angles fight each other. Lay out every hole on every board before you start drilling. The bottom also needs a through hole for power, but that comes later with a different bit. Skip marking it now and you risk drilling a pocket hole where the cord needs to pass through.
Assemble the Station

- Work on the flattest surface you own, even if that means clearing the kitchen table. A slight bow in the shelf will telegraph through every piece that follows.
- Dry-fit the back and front trim against the shelf, then clamp before driving any screws. Wood glue needs the squeeze; clamping buys you time to check square.
- Hold a carpenter’s square in each corner as the glue sets. If the frame goes out of square, loosen the clamps and rack it straight. A frame that sets crooked stays crooked.
- Drive 1-1/4" pocket screws through the shelf into the trim once the corners read true. Keep the screws on the underside or back; the visible face stays clean.
- Clamp the sides with the good faces out, then run pocket screws through the shelf bottom and back into each side. Tighten in stages so nothing shifts as the screws bite.
- Step back and sight down the assembly. If it rocks, the floor or the piece is off. Fix it now, while the glue still has give.
Install the Charging Components

A concealed chase for routing cords keeps the front of a tool charging station looking tidy, which is the main reason this beats a simple shelf. I cut mine from a quarter sheet of plywood, leaving a gap behind the charger shelf that runs top to bottom. Cords drop through holes drilled with a 1 1/2-inch Forstner bit, close to each charger so the slack stays hidden; when two wires land near each other, they share the same hole. Excess length coils in the chase rather than bundling behind the charger where it bulges.
Power strips mount with screws or, if placement is still uncertain, 3M adhesive strips hold well enough that you may never need the screws. Leave enough slack that chargers can shift slightly without tugging the plug, but not so much that it piles up and blocks airflow. Chargers run warm, and an enclosed compartment without ventilation gaps will shorten their life. I leave a finger-width space around each strip and make sure the chase itself is open at top or bottom so heat escapes. A switched outlet strip is worth the few extra dollars: being able to kill power to individual chargers without crawling back to unplug them saves enough hassle over a year that you will not regret it.
Mount the Station
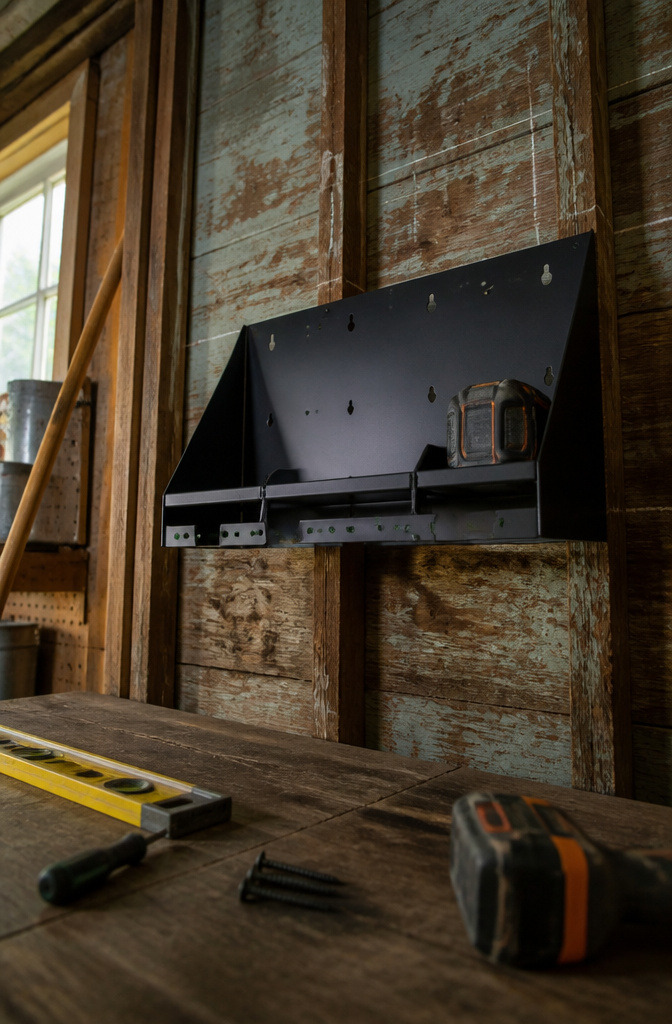
A stud finder saves more time than it costs on this step. Wall studs sit 16 inches apart in most American framing, and the station’s back panel comes pre-drilled with holes spaced exactly for that layout. I line the center hole up with the nearest stud to the outlet, then mark the outer two holes and confirm they hit solid wood.
The station ships with #8 x 2-1/2" screws for the top edge. I start with the center screw, hang a level along the front lip, and adjust before driving the outer two. The bottom has two pocket holes facing the wall, 32 inches apart, meant for 1-1/4" pocket screws into the outer studs. Those screws are insurance: the top three carry the load of chargers and batteries fine on their own, but the bottom pair keep the shelf from tipping up if something bumps it from below.
Lag bolts or heavy-duty brackets only matter if you are stacking multiple stations or parking a miter saw on top. For a single unit, the included screws are enough. A second pair of hands is useful here, though. The plywood back is light, but holding it steady while checking level and driving the first screw is awkward solo. I have balanced it on a stepladder before; the wall won twice.
Load and Organize Tools

Chargers slide in easiest when the shelf height matches the unit with a battery already seated, not the bare charger alone. That extra inch or two of clearance keeps you from fighting the fit every time you swap a pack. I group mine by brand, since the battery shapes are different enough that mixing them wastes space, and I leave the front row for whatever tool I used that week. The back row holds the second-tier stuff: the brad nailer I pull out quarterly, the random orbit sander for summer projects. Hand height is the line I draw between them. Anything above that shelf collects dust; anything below it means bending, and bending means the tool stays put.
Batteries themselves need a home with room to double in count over two or three years. Most people I know who started with two packs are running six or eight now, thanks to holiday sales and the occasional bare-tool deal. A shallow bin or a short row of cubbies works better than stacking, since lithium packs run warm and need air around them. The same compartment that hides your power strip and corrals cords, as MWA Woodworks does with a false wall, also shields chargers from direct sun that builds heat and shortens battery life. Ventilation matters more than a clean look, but the clean look is what keeps you opening the cabinet instead of leaving chargers on the garage floor.
Station Types Compared
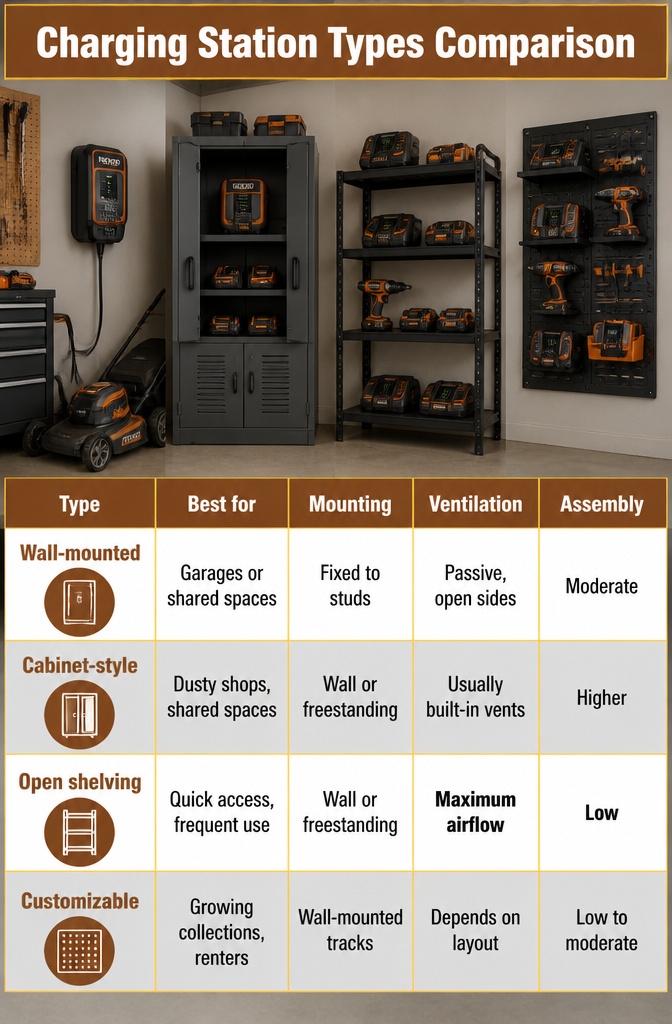
Wall-mounted units make the most of vertical space in a garage corner where floor real estate is already taken up by a mower or workbench. Cabinet-style stations with doors keep battery chargers clean in a dusty shop but need a footprint on the floor or a sturdy bench. Open shelving trades protection for speed: you grab the drill and its charged battery in one motion, which matters when you are mid-project and the light is fading. Customizable designs, usually a grid of pegboard or slotted wall panels, let you move hooks and shelves as your tool collection grows or shrinks.
| Type | Best for | Mounting | Ventilation | Assembly |
|---|---|---|---|---|
| Wall-mounted | Garage corners, narrow spaces | Fixed to studs | Passive, open sides | Moderate |
| Cabinet-style | Dusty shops, shared spaces | Wall or freestanding | Usually built-in vents | Higher |
| Open shelving | Quick access, frequent use | Wall or freestanding | Maximum airflow | Low |
| Customizable | Growing collections, renters | Wall-mounted tracks | Depends on layout | Low to moderate |
Renters should note that wall-mounted and customizable systems leave more holes than cabinet units, but they also travel with you if you match the track spacing at the next place. For a first station, open shelving gets you charging this weekend without a full build.
What Keeps Batteries Safe
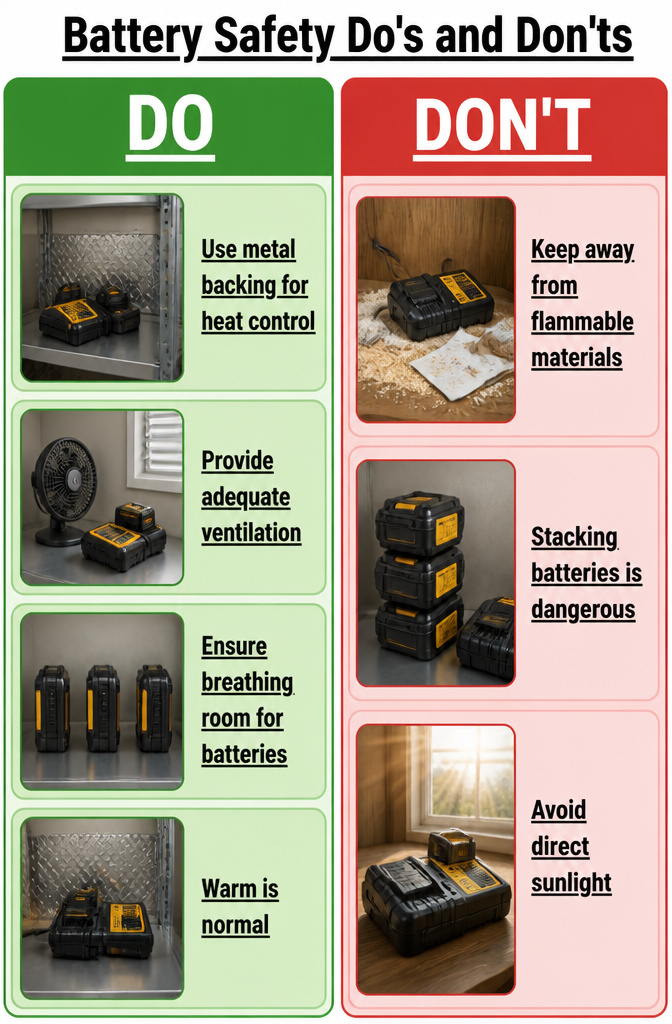
Lithium batteries need breathing room, and the wall you pick matters more than the shelf itself. Keep the station away from anything that burns and off surfaces lined with paper, cloth, or sawdust. Metal backing or a metal-lined enclosure gives runaway heat somewhere to go instead of into the wall behind it.
Ventilation extends the life of both batteries and chargers. A charger baking in direct sunlight works harder than it should, and the heat compounds. On first use with any new setup, run your hand near the charger after twenty or thirty minutes. Warm is normal; hot is a signal to unplug and find more airflow.
Batteries also need space from each other. Stacking them while they charge traps heat between the packs where no fan reaches. Stand them upright with room to radiate, the same spacing you’d want if one started smoking. A neighbor’s DeWalt charger did exactly that mid-cycle, and the insurance investigator knew to ask about batteries before he said hello.
Customizing for Your Collection
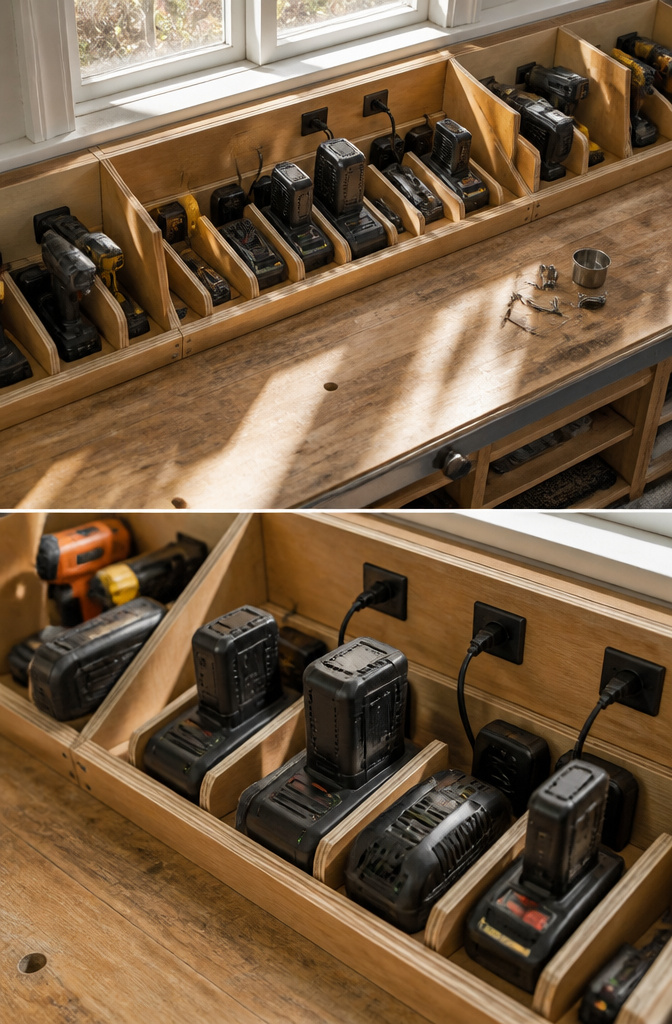
The battery compartment is where most people go wrong by building to what they own today instead of what they’ll own next year. Measure the height of your tallest battery when it is plugged into its charger, not the charger alone, because that plugged-in battery is the real ceiling you need. If you run DeWalt now but your next drill might be Milwaukee, leave the compartment deeper than your current chargers demand. A false wall of scrap plywood hides the extra space and the cord tangle behind it until you need the room.
Dividers for the tool bays work the same way. A fixed grid for four tools becomes useless when you pick up a fifth or replace a compact impact driver with a bulkier model. The pocket-hole-and-glue method gives solid compartments, but plan one or two bays wider than your largest tool currently is. Hanging storage for drills, with vertical plywood strips and a gap for the handle, needs even more foresight; the top-heavy body width varies more across brands than the handle does.
French cleat mounting makes the whole unit expandable sideways when you outgrow the first frame. Individual cleats or direct wall screws work if you know your collection is set, but cleats win if you are the type who walks out of the store with a new battery platform every other spring. The door size over the charging compartment should be driven by charger count, not aesthetics; more chargers means a taller door, fewer means you keep the cabinet lighter and the hinges happier.
Frequently Asked Questions
What materials do I need to build a tool charging station?
Start with 3/4 inch plywood for the box, either one 60 by 60 inch sheet or two pieces at 3/4 by 30 by 60 inches. You will also need Kreg pocket hole screws, a pocket hole jig, a heavy-duty power strip with spaced outlets, wood glue, and basic tools including a circular saw or table saw and a drill. For the concealed cord chase, grab a quarter sheet of plywood and a few extra screws.
How do I design a charging station for my tools?
Measure each charger flat, then stack a battery on top and measure again. That loaded height is your minimum clearance. Depth matters too; a charger with a battery sticking out front to back needs a deeper shelf. Leave at least an inch of open space above each battery for airflow, and sketch your cord paths on paper before you cut anything so you can build the concealed chase behind a false wall if you want a clean look.
What are the best practices for mounting a charging station?
Use a stud finder first. The back panel comes pre-drilled with holes spaced 16 inches apart for standard American wall studs, so line the center hole with the stud nearest your outlet and confirm the outer two hit solid wood. Start with the center screw, hang a level along the front lip, adjust, then drive the outer two. The top three screws carry the load; the bottom pair of pocket holes into the outer studs keeps the shelf from tipping if something bumps it from below.