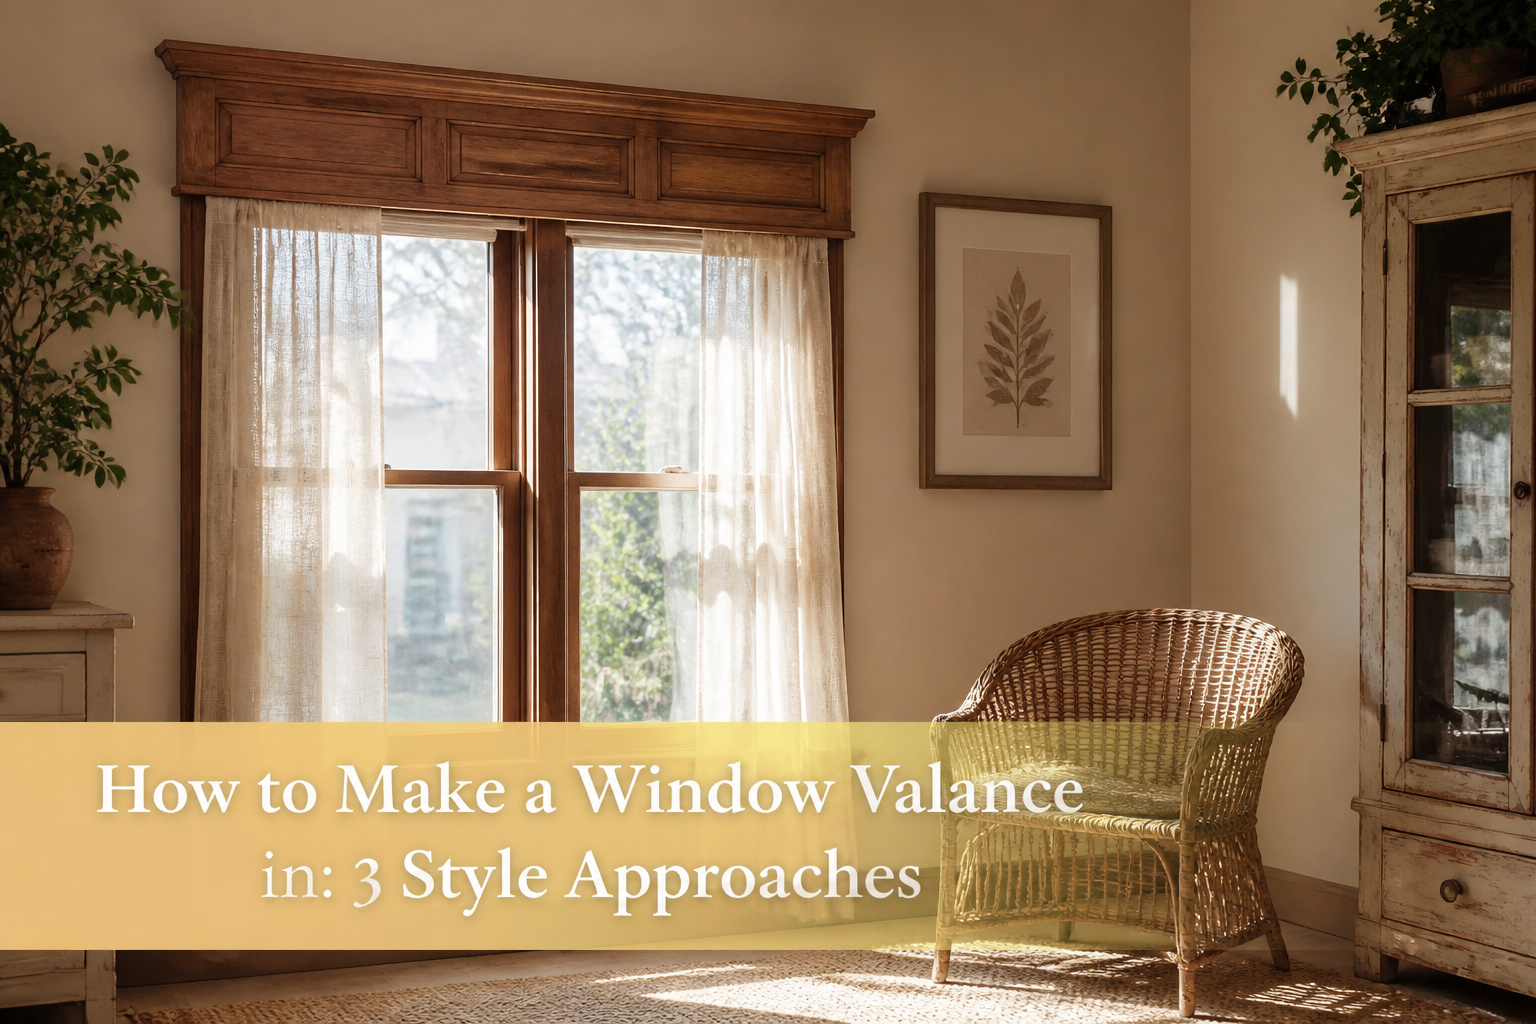
A finished valance can cost as little as twenty dollars and one Saturday afternoon, or it can swallow a weekend, a miter saw, and a trip back to the lumber yard for boards you measured wrong. The difference is not skill; it is the moment you decide whether the window gets fabric, foam, or wood. Most people choose fabric because it folds flat when they move, then ruin it in the first cut by forgetting the extra five inches for side hems that turn a generous panel into a narrow ribbon.
1. Measure the Window
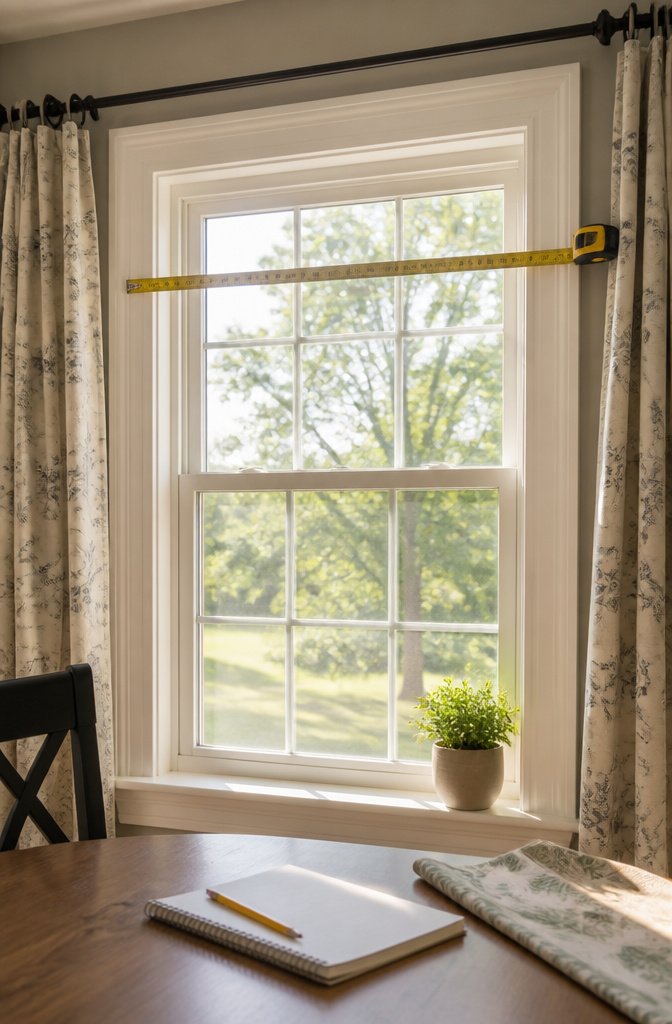
A valance that looks custom starts with numbers that are slightly larger than the window itself. Width comes first: measure the full distance from frame edge to frame edge, then add 5 inches for overlap and hem allowances on each side. For a gathered look, multiply that finished width by 1.5; for a fuller traditional valance, double it. Height is simpler. Most valances hang 15–18 inches from the rod down, which covers the top third of a standard window without blocking light. Add 3 inches to that measurement for the top casing and bottom hem.
Fabric yardage follows from those totals. A typical window needs 3–3.5 yards of 44-inch fabric for the main panel, and about 3 yards of lining if you are using one. Cut the lining 3 inches shorter than the main fabric so the hem stays hidden underneath. If your calculated width exceeds what a single fabric width can cover, plan to seam two pieces or hang twin valances side by side.
2. Select Materials
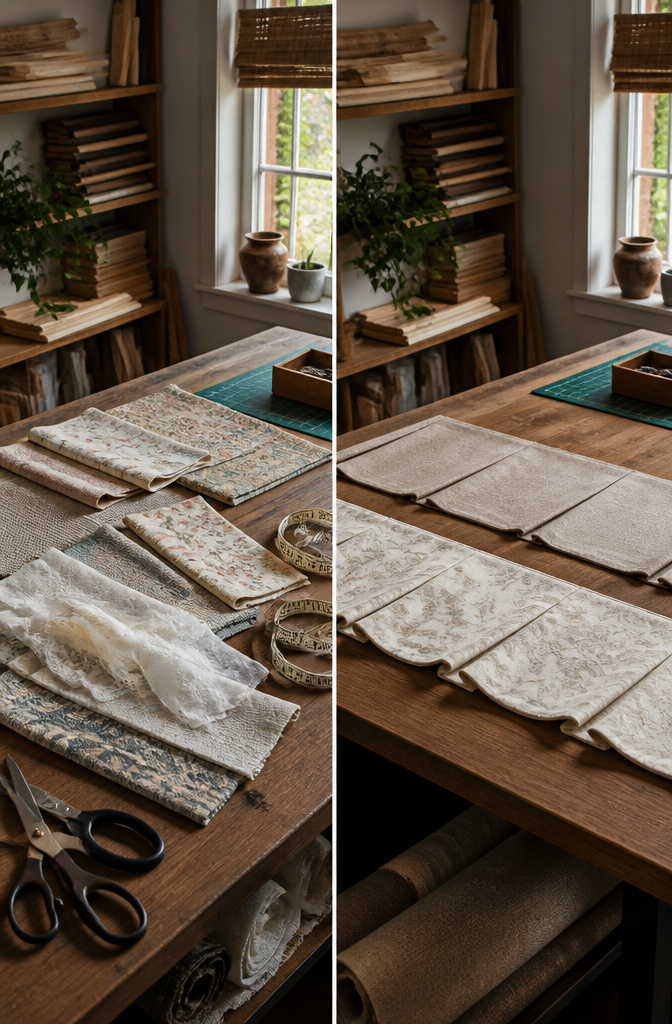
Fabric is the starting point most people picture, and the weight you choose changes the whole job. Lightweight cotton, lace, or sheer fabric drapes softly and works well for gathered or relaxed styles that do not need internal structure. Heavier decorator fabrics, brocade, or flannel hold a shape but fight you at the machine; some are dry-clean only, so check the bolt label if this is going in a kitchen or bathroom where washable cotton makes more sense. Buy a little more than your measurements suggest, since a crooked cut or a pulled thread can eat up extra inches fast.
Wood builds a cornice with real presence. A 1 inch x 8 inch x 12 ft board in pine or MDF gives you the standard depth and height for mounting above the frame, and the hardware is straightforward: 1 inch screws for joining, 2 1/2 inch screws and metal corner brackets for the back structure. You will need a miter saw or a trip to the store for cuts.
Foam is the outlier that saves you from both sewing and sawing. Thick foam insulation from the hardware store shapes into a valance that hangs on hooks or even Command Strips, light enough that a renter can install and remove it without touching the wall with a drill. It is temporary by nature, and the surface will not take the same abuse as wood, but for a dorm room or a lease that ends in August, the trade is usually worth it.
3. Cut Materials to Size

Cutting fabric to the right size is where a valance project lives or dies, because every allowance you forget shrinks the finished piece. I learned this the hard way on my first attempt, when a valance that looked generous on the table hung like a narrow ribbon over the window. The fix is simple arithmetic done before the scissors touch cloth.
For the width, the finished valance needs to cover the rod and extend past the brackets if you want that look. The sources disagree on fullness, which is worth knowing before you cut. A gathered valance multiplies the rod width by 1.5× for a light gather, or up to 2.5× for heavier fabrics that need more drape. Sheers take the higher end; cotton duck or linen sits closer to 2×. I split the difference at 2× for a medium-weight fabric and have not regretted it.
Add 5 inches to the width for side hems and finishing, and 3 inches to the length for the bottom hem and rod pocket together. That breaks down practically: 1 inch for the bottom hem, folded twice, and 2 to 3 inches for the rod pocket depending on your hardware. A standard curtain rod under 1 inch in diameter takes a 2-inch pocket; anything thicker needs closer to 3 inches or the fabric bunches instead of sliding. Measure around the rod’s widest point, add half an inch for ease, then divide by two. My decorative rod ran 2¼ inches around, so the math gave 1.375 inches, rounded to 1½ inches, doubled to 3 inches for the finished pocket depth.
The length below the rod is where taste enters. Common ranges run 15 to 18 inches for a standard window, or roughly one-quarter of the window height plus an inch. An 18-inch drop looked right on my larger window; a 12-inch drop on a small bathroom window felt balanced. Cut the total length to your chosen drop plus that 3-inch allowance, and mark every edge before cutting. Fabric shifts, especially off the bolt, and a crooked first cut propagates through every later step.
4. Sew or Assemble the Valance

Fabric valances start with the rod pocket, which is the channel the curtain rod slides through. Fold the top edge down half an inch and press it flat, then fold again three inches to match your rod diameter and pin. Sew across the bottom of that fold, leaving the full width open so the rod can pass. For the hem, a similar double fold keeps the bottom edge clean. A one-inch seam allowance on the sides lets you turn a neat edge without the valance pulling narrow, and that same allowance gives you room to create gather: the finished width should run roughly one-and-a-half to two times the window width so the fabric bunches softly rather than hanging flat.
Wooden valances come together as a three-sided box. Corner brackets and screws join the short return pieces to the face board; some builds use pocket holes instead for a cleaner front. Batting goes on first, stapled around to the inside, then fabric wraps the whole form and tacks the same way. The brackets that hold the curtain rod mount to the front of the box before you upholster, so the hardware hides under the layers.
Upholstered designs are where the two methods meet. The wood gives the shape, the fabric gives the finish, and the staple gun does the work a sewing machine would on soft goods alone.
5. Finish the Edges
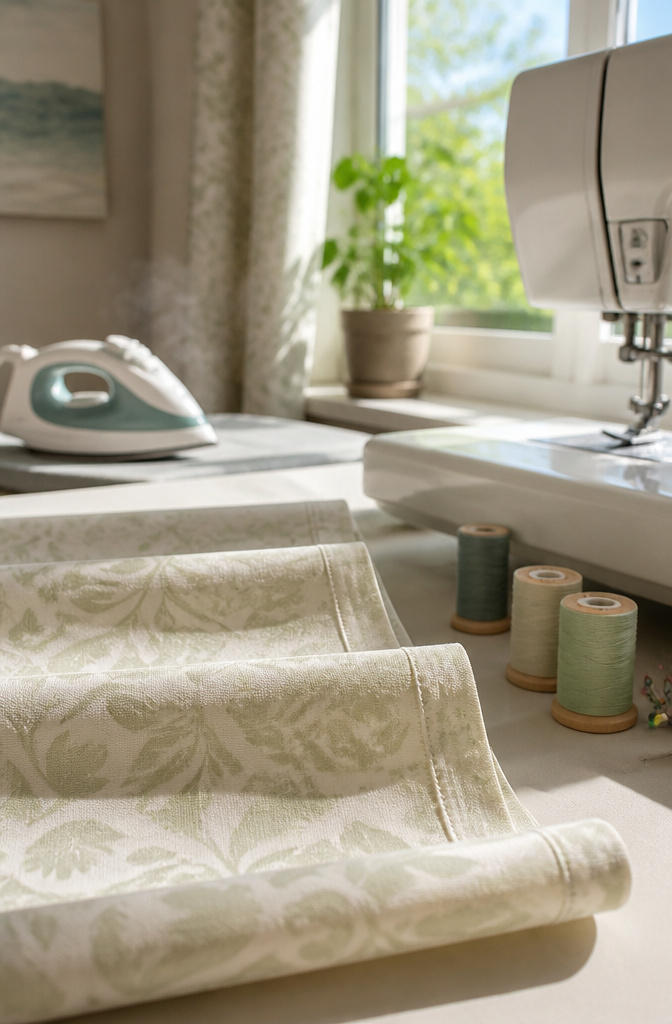
A double-fold hem on fabric hides the raw edge completely and sits flatter than a single fold pressed right to the line. Fold once, press, then fold again so the edge tucks inside, and pin before you sew so the layers do not shift under the machine. For the bottom of a fabric valance, a blind hem stitch leaves almost no visible thread on the right side; the needle just catches the fold every few stitches.
Wood needs the same attention to edges. Sand every cut face, working up through grits until the surface feels smooth to your fingertips, not just to your eye. Stain goes farther than most people expect; wipe excess off the brush or rag before it touches the wood, or the piece turns nearly black in spots. Let it dry overnight before handling, and rest larger boards on saw horses so air reaches both faces.
Either way, the finish is what survives a few years of sun and dust. A rushed edge frays or splinters, and you notice it every time the light hits the window.
6. Hang the Valance
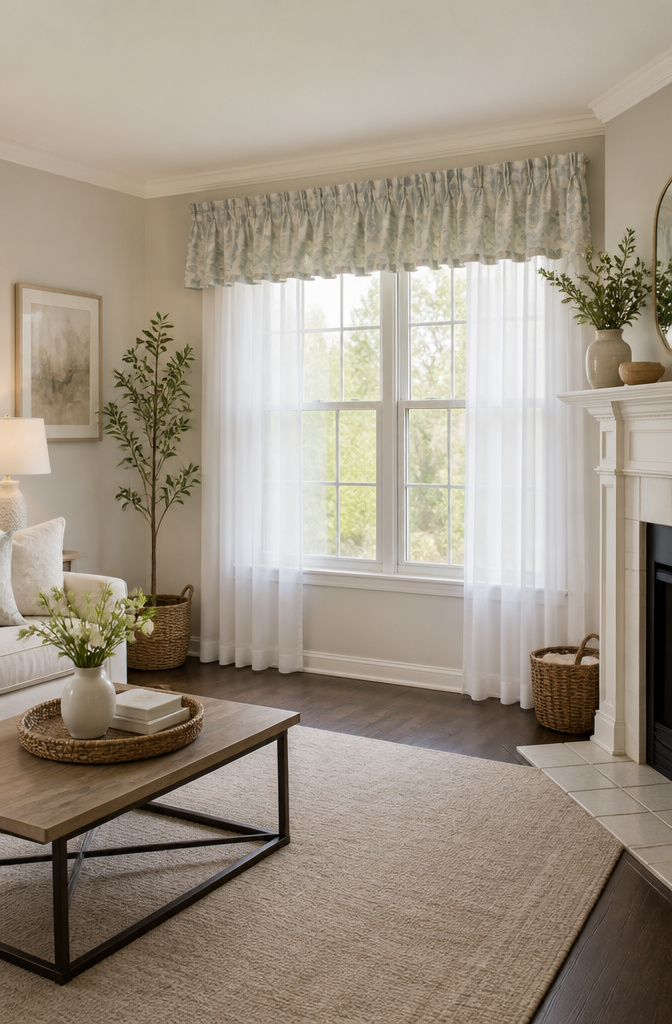
The mounting method you choose determines whether the valance reads as a light fabric accent or a fixed architectural piece. Board-mounted valances sit like a shelf above the window, with L-brackets screwed into the wall and the wrapped board dropped onto them from above. A paint stick marked at five inches makes a quick template for drawing the bracket line across the wall; drywall anchors hold where studs miss. Center the board before driving the screws, because a quarter-inch skew telegraphs across the whole wall.
Rod-mounted and tension-rod styles stay softer and more forgiving. A standard curtain rod lets the valance bunch and move; a tension rod tucked inside the frame gives a flush, minimal look better suited to narrow windows or renters who patch holes at move-out. The common fullness rule calls for fabric at twice the window width, though a tension-rod valance can drop to 1.5 times if you want less bulk.
What convinced me, reading through the build logs, was the difference in stability. A rod-mounted valance sways when the window opens; a board-mounted one, screwed tight, survives kids pulling and vacuum cords snagging. The tradeoff is commitment: brackets leave anchors to fill later, while a tension rod leaves nothing but a faint ring of dust. For a first project on a Saturday, that choice matters more than the fabric pattern.
7. Fabric Valance Styles
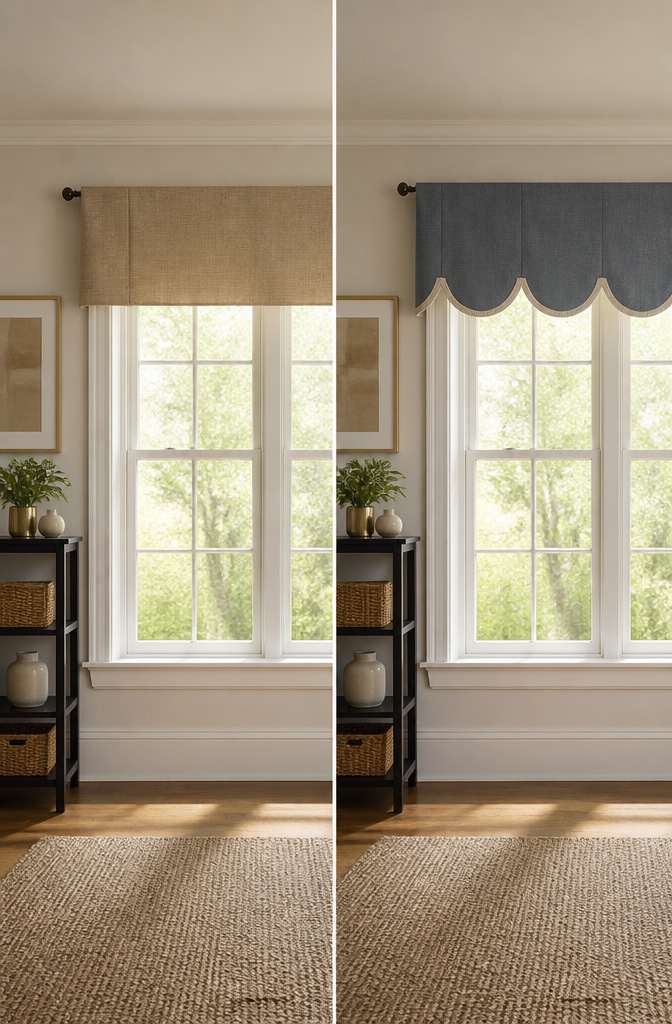
The simplest fabric valance is nothing more than a straight panel hung across a rod, hemmed on all four sides. It takes a sewing machine and an afternoon, and it folds away flat when you move. That is the baseline most renters should start from.
A scalloped edge with curved cuts needs more planning. The shape is drawn onto the bottom hem before cutting, then faced with a second layer so the raw edge disappears. The bracket-mounted version from the home blogs gets its curve from decorative wooden brackets rather than fabric alone, which hides the hardware and gives the window a little architectural weight. It is still a weekend build, but measuring the scallops evenly is the step that trips people up; paper templates help.
The upholstered valance box, fabric-wrapped over a wood frame, is the most involved of the three. A 2×4 frame, really 1.5 by 3.5 inches, gets wrapped in batting and fabric, then mounted to the wall with screws into studs or anchors. Velcro lining the front board lets the fabric lift off for washing, which matters more than people expect in kitchens. The finished box reads as built-in, but it also reads as permanent, and the materials cost more than a simple panel by a noticeable margin. For a first project, the straight fabric or the scalloped bracket version leaves less room for a lopsided result.
8. Wood and Foam Alternatives
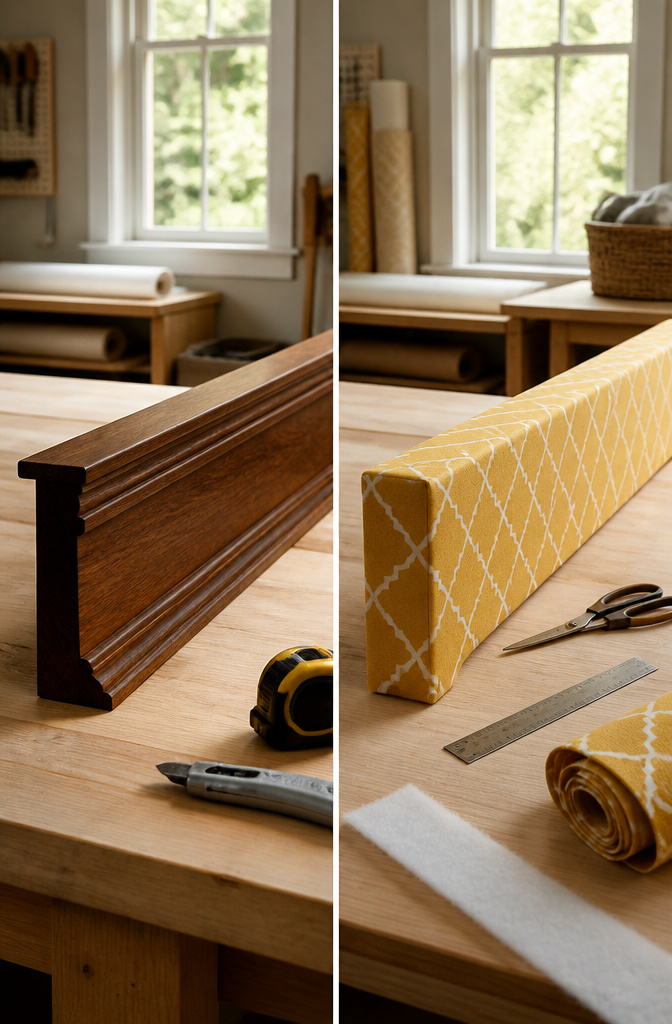
A wooden cornice built from 1-by-8 pine with mitered molding and L-bracket mounting is the sturdiest route, but it demands a miter saw, wood putty, and a willingness to sand between coats of paint or stain. The finished piece takes screws into studs and can carry curtain rods on wooden circles if you add them. Foam insulation board skips every power tool: cut it with a utility knife, cover the face in fabric or paint, and hang it on Command Strips or simple hooks. The foam version is genuinely temporary; bump it hard and it dents, and humidity can warp the face over time. The wood build, done right, stays with the house. Choose wood if you own the place and already own a saw, or if you want a dark walnut stain that reads as built-in. Choose foam if you are renting, if your total tool collection fits in a kitchen drawer, or if you need the valance down again by August. The skill gap is real: one asks for 45-degree angles standing upright in the miter box, the other asks for straight cuts and patience with adhesive.
What You Need Before Starting
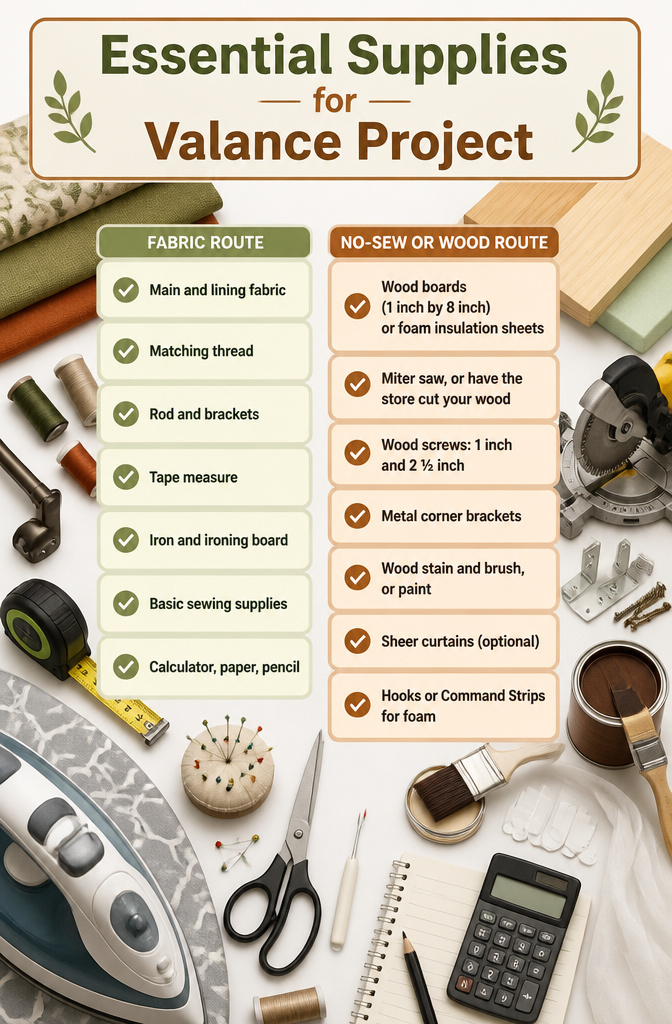
A valance project lives or dies in the prep. The supplies split cleanly into two camps: fabric and everything else, or wood or foam and the hardware to hold it up.
Fabric route
- Main fabric and a solid lining fabric
- Thread to match
- Rod and brackets
- Tape measure
- Iron and ironing board
- Basic sewing supplies: needle, scissors, pins
- Calculator, paper, pencil
No-sew or wood route
- Wood boards (1 inch by 8 inch) or foam insulation sheets
- Miter saw, or have the store cut your wood
- Wood screws: 1 inch and 2 ½ inch
- Metal corner brackets
- Wood stain and brush, or paint
- Sheer curtains (optional)
- Hooks or Command Strips for foam
A tension rod works for lightweight fabric. Heavier builds need brackets screwed into the frame or wall. DIY valances can run as little as $20, though wood versions climb once you factor in lumber and hardware you do not already own.
Before buying anything, measure twice and do the math on fabric yardage or board lengths. Running short on the main material is the mistake that turns a Saturday project into a two-weekend one.
Sewing Techniques That Matter
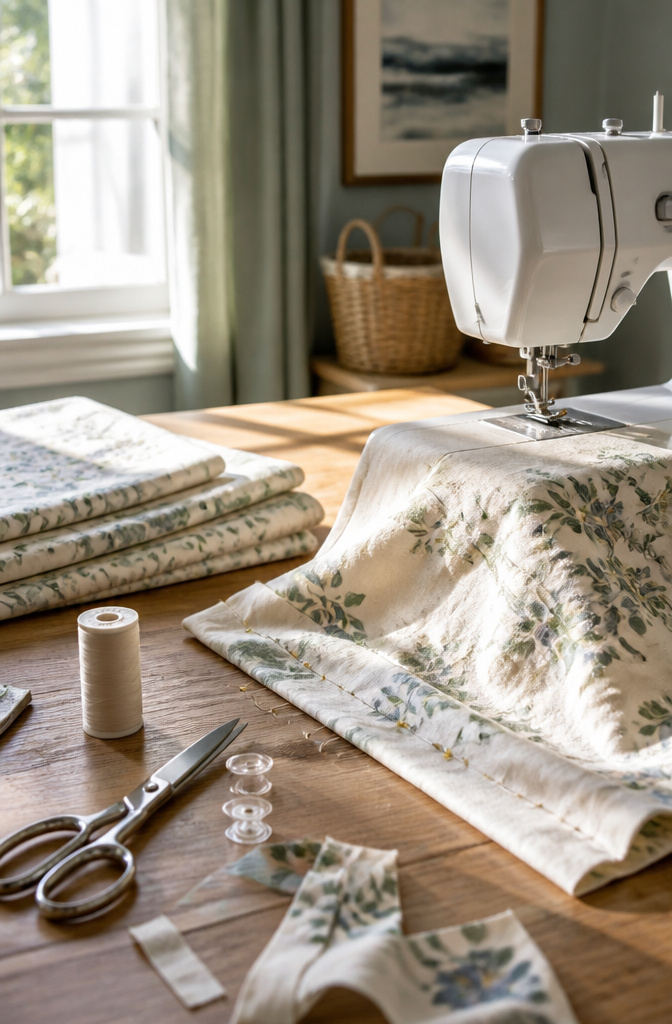
A half-inch seam allowance is the baseline for most valance work, and pressing it flat before you sew keeps the edge from creeping as the machine moves. For the rod pocket, fold the top down that half inch first, then fold again to create a channel deep enough for your rod; three inches is the usual depth, though a thicker curtain rod needs more. Sew the bottom of that folded channel about a quarter inch from its lower edge, leaving the ends open so the rod can slide through.
Fullness comes from gathering the fabric to one and a half or two times the finished width. I find the lower multiplier works better for a flush-mounted valance on a tension rod inside the frame, where too much bulk fights the hardware. For a standard rod mount, doubling the window width gives the soft drape most people picture.
Finishing means a second row of stitching at the top fold for strength, and trimming threads before you hang anything. If your fabric is not wide enough for the gathered width you want, two valance panels side by side solve it without a center seam that shows.
Installation Methods Compared
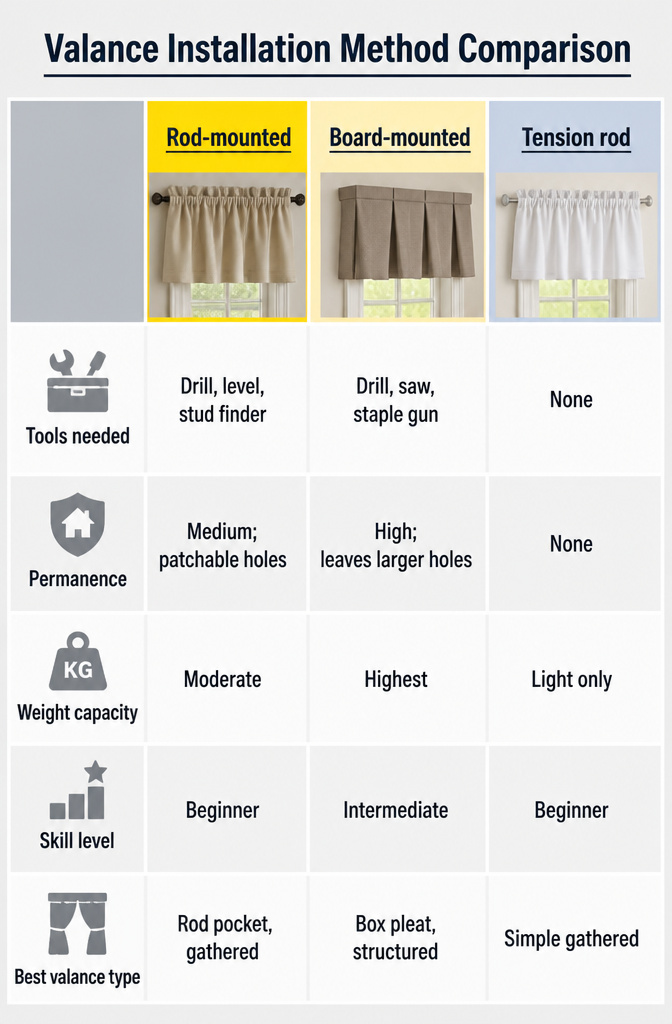
The way you mount a valance changes almost everything about the build. Rod-mounted valances need a casing or pocket sewn into the top edge, which is straightforward if you already own a drill and level. Board-mounted gives the cleanest silhouette for box pleats or tailored shapes, but you are committing a piece of lumber to the wall and filling holes later. Tension rods trade weight capacity for zero holes, which makes them the default choice for renters doing a soft gathered style on a narrow window.
| Rod-mounted | Board-mounted | Tension rod | |
|---|---|---|---|
| Tools needed | Drill, level, stud finder | Drill, saw, staple gun | None |
| Permanence | Medium; patchable holes | High; leaves larger holes | None |
| Weight capacity | Moderate | Highest | Light only |
| Skill level | Beginner | Intermediate | Beginner |
| Best valance type | Rod pocket, gathered | Box pleat, structured | Simple gathered |
Board-mounted wins for heavy fabrics or layered treatments, but tension rods are the only option that moves with you without a spackle session. For a first project, rod-mounted hits the middle ground: you learn one construction method and the hardware is forgiving if you measure twice.
Valance Length and Placement Rules
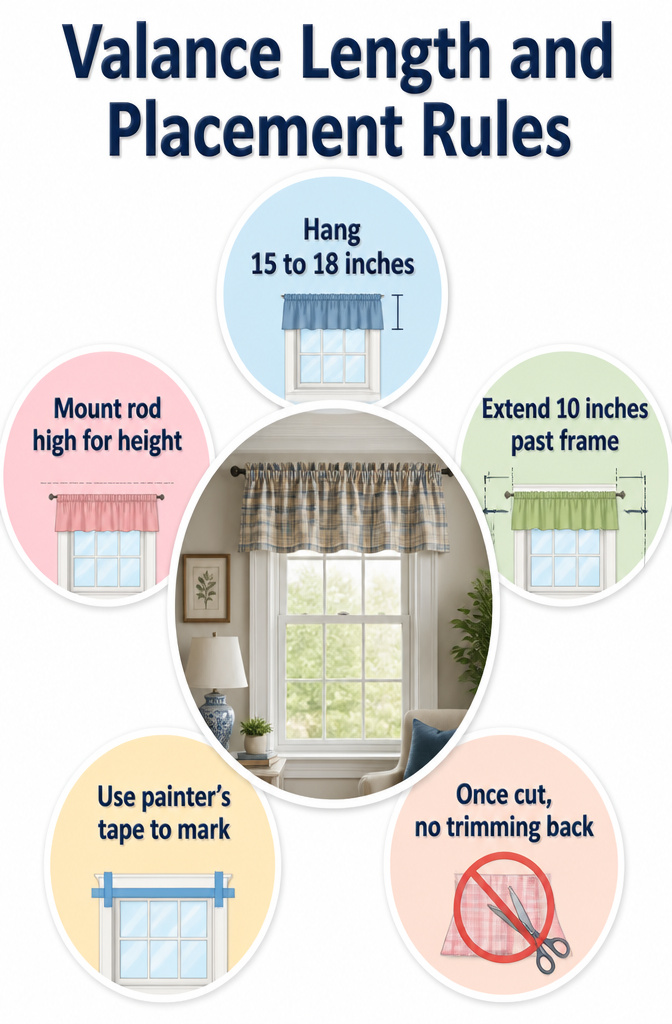
A valance should hang 15 to 18 inches from rod to hem for most standard windows, which covers roughly the top quarter to third of the glass. On a 45-inch window, that proportion lands right in that range. Taller windows can handle a longer drop, though once you pass about 16 inches the piece starts reading more like a short curtain than a true valance.
Where you mount the rod matters as much as the fabric length. Placing it high, close to the ceiling line, draws the eye upward and makes the window feel larger. Extending the valance 10 inches past each side of the frame does the same work horizontally, so the treatment reads as generous rather than skimpy. I always mark the finished length with painter’s tape and live with it for a day before cutting; fabric looks different pinned in place than it does on the table, and hem allowance is easier to trim than to add back.
Frequently Asked Questions
What is a valance?
A valance is a short curtain or fabric treatment that covers the top portion of a window, typically mounted on a rod or board above the frame to hide hardware and add a finished look.
How long should a valance be?
Most valances hang 15 to 18 inches from the rod down, which covers roughly the top quarter to third of a standard window without blocking light. Taller windows can handle a longer drop, though anything past about 16 inches starts to read more like a short curtain.
What materials do I need to make a valance?
Fabric valances need main fabric, lining if desired, matching thread, a rod and brackets, tape measure, iron, and basic sewing supplies. Wood or foam builds call for boards or insulation sheets, cutting tools, screws or adhesive, and mounting hardware. DIY fabric valances can run as little as $20.
How do I hang a valance?
Rod-mounted styles slide onto a curtain rod with a sewn pocket. Board-mounted valances drop onto L-brackets screwed to the wall. Tension rods tuck inside the window frame for a flush look with no holes. Foam versions can hang on Command Strips or simple hooks.
Can I use foam board for a valance?
Yes, thick foam insulation board works well for a lightweight, temporary valance. Cut it with a utility knife, cover the face in fabric or paint, and hang it with hooks or Command Strips. It is ideal for rentals and dorm rooms, though it dents easily and humidity can warp it over time.