I’ve transformed cramped bathrooms by stacking light upward instead of spreading outward. I start with recessed 4-inch ceiling lights plus a 75-inch vanity fixture so my face gets even, shadow-free glow. Then I hang an oversized 36-inch mirror opposite any window. It bounces daylight everywhere and creates the visual impression of double the room size. I pick large 12-by-24-inch porcelain tiles with minimal grout lines, running them straight into the shower and up to the ceiling for that cathedral-height feel. My wall-hung toilet frees about 9 inches of precious floor area, and I pair it with a compact 24-by-20-inch floating vanity so the floor stays visible and cleaning gets easier. Above the toilet and door, I slot three slim 24-inch pine floating shelves for rolled towels and tiny plants. I recess my medicine cabinet 4 inches into the wall, which keeps my counter clear of toothbrush clutter. My shower wears frameless glass with a zero-threshold entry, and I carve a 12-by-24-inch tiled niche right into the wall for shampoo. Wall-mounted hooks and slim under-2-inch rail systems keep towels reachable without floor clutter. These layered solutions work together to maximize functionality and usable space.
Brighten Your Bathroom With Layered Lighting Design
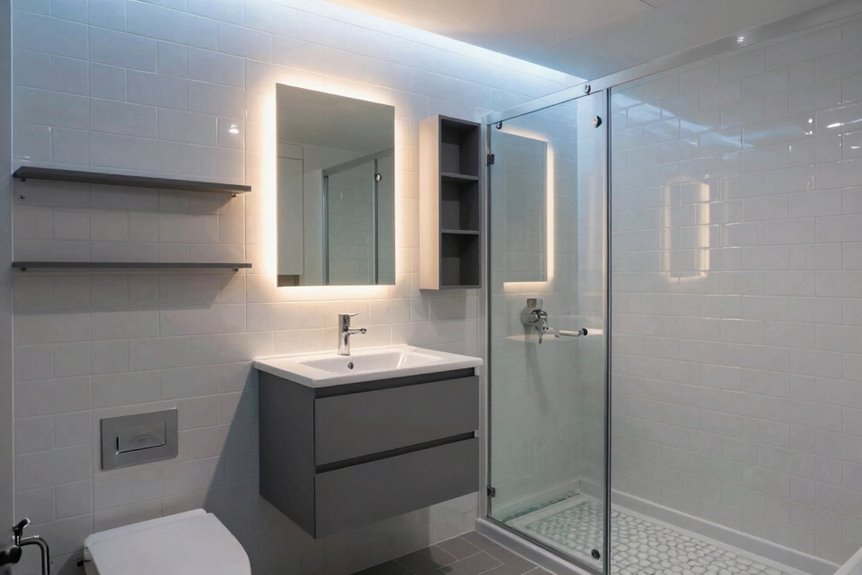
Ever stood in your bathroom and felt like you’re getting ready in a cave. I’ve been there, and I can help transform that gloomy space. Layered lighting changes everything. It’s your secret weapon against those stubborn shadows that make shaving or applying makeup tricky.
To brighten a bathroom, combine recessed ceiling lights (about 4 inches across) with vanity fixtures positioned 75 inches above the floor. The recessed lighting spreads illumination evenly, eliminating those annoying dark pockets. Meanwhile, the vanity lighting banishes under-eye shadows.
Paint matters too. Choose crisp white and pale gray tones that bounce light around rather than absorb it. If you’ve got a window, maximize it. Natural daylight works beautifully with your artificial layers, creating genuine brightness that makes morning routines feel less like spelunking.
Double Visual Space With Strategic Mirror Placement
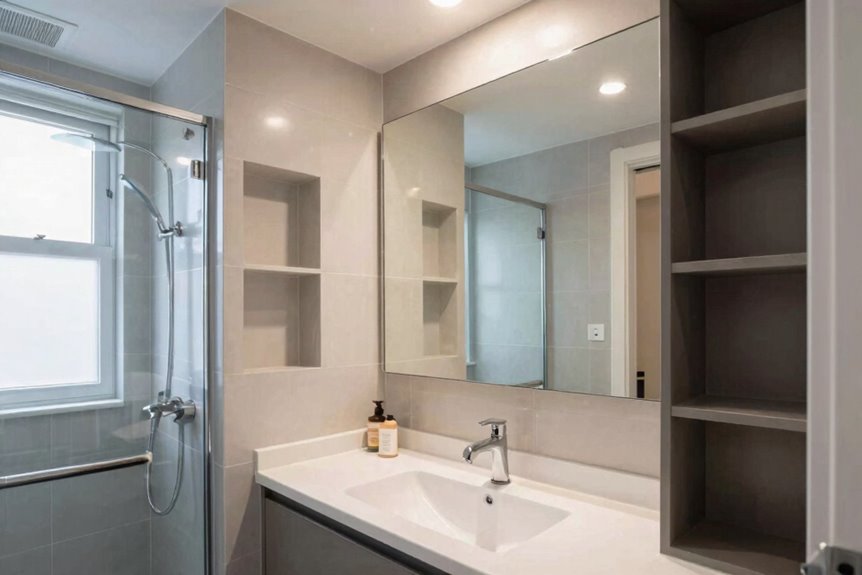
I want to show you how mirrors can trick your eyes into seeing twice the room you’ve actually got. Start with the basics. Where you hang them matters just as much as how big they are. Catching that morning sunlight in the glass makes everything feel airy and open. Then look at oversized mirrors, the kind that stretch 36 inches or more, because one giant reflective surface beats a cluttered wall of tiny frames every single time.
Mirror Placement Basics
When you’re staring down a cramped bathroom that feels more like a closet with a sink, a well-placed mirror can transform the space. A mirror spanning your whole wall, or at least 36 inches wide, tricks your eyes into seeing double the room.
Here’s your space-saving strategy:
| Mirror Style | Best Spot | Visual Trick |
|---|---|---|
| Tall and skinny | Behind the toilet | Raises ceiling height |
| Wide horizontal | Above vanity | Stretches walls outward |
| Full wall span | Opposite door | Creates depth illusion |
| Oversized round | Beside window | Softens tight corners |
| Vertical rectangle | Between sconces | Lifts everything up |
Pair your mirrors with wall-hung sinks to keep floor visible. Match mirrors with large tiles and paint in similar tones. Seamless planes make the room feel open and reduce the sensation of being confined to a small space.
Reflecting Natural Light
How do you make a tiny bathroom feel like it’s got room to breathe? Mirrors bounce natural light around the space effectively.
Position a large mirror, about 36 inches wide, directly opposite the window. This floods the space with daylight, making walls practically disappear. Tall mirrors that stretch from counter to ceiling create a noticeably larger sense of space. Light travels deeper into corners you’d forgotten existed.
Skip chunky frames. Choose edge-to-edge styles like the IKEA HOVET or simple frameless panels. They’re clean, light, and don’t clutter your sightline.
Pair these with soft whites or pale blues, and your bathroom will feel airy rather than cramped. The space becomes more inviting and functional.
Oversized Mirror Impact
Why stop at a standard mirror when you can expand your sense of space dramatically? Oversized mirrors transform how we perceive dimensions. A mirror spanning an entire vanity wall makes a cramped bathroom feel more open.
The ceiling appears taller. The walls seem farther apart. This is intentional spatial design, not renovation.
Position the mirror opposite a window. Morning light bounces throughout the space, eliminating shadows and dark corners. No more cave-like showers.
Choose wall-to-wall glass or a single tall panel reaching toward crown molding. Beveled edges catch light with sophisticated restraint.
Multiple mirrors create layered reflections that amplify depth and eliminate feelings of confinement.
This is intelligent design with measurable results. Your bathroom can achieve a polished, magazine-worthy appearance through strategic mirror placement.
Expand Perceived Size With Large-Scale Floor and Wall Tiles
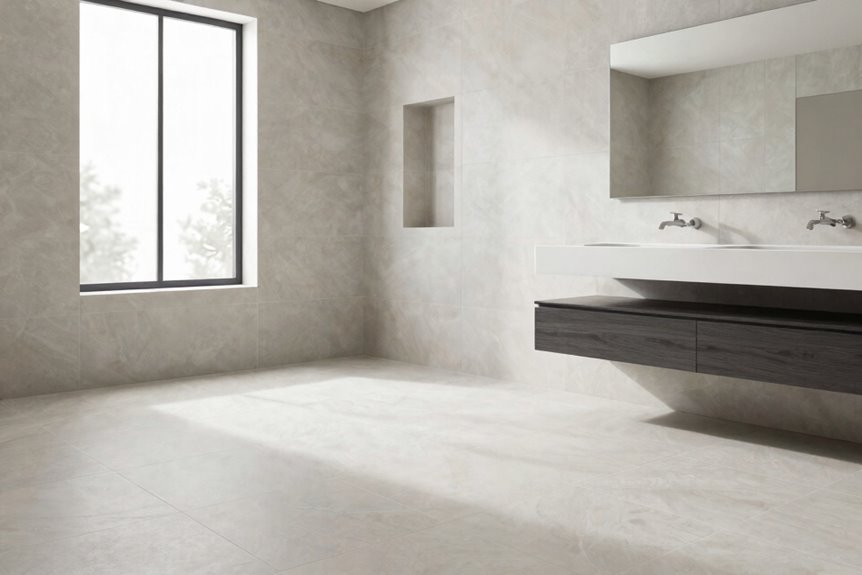
Ever stood in a cramped bathroom and felt like the walls were closing in. Bigger tile size changes everything. I swap tiny mosaics for 12-by-24-inch porcelain slabs, and suddenly the perceived space doubles. Fewer grout lines mean broader, calmer visual planes. You’re essentially unrolling a continuous sheet instead of piecing together a puzzle.
I run identical tiles straight into the shower enclosure. No visual breaks, no stop signals. The room flows seamlessly.
Push wall tiles all the way to the ceiling. Pick a tone near the top that catches light. This creates the illusion of cathedral height in eight-foot walls.
Try diagonal placement too. It tricks the eye into seeing width where there isn’t much.
Small bathroom, big feel.
Choose Compact Vanities That Preserve Traffic Flow
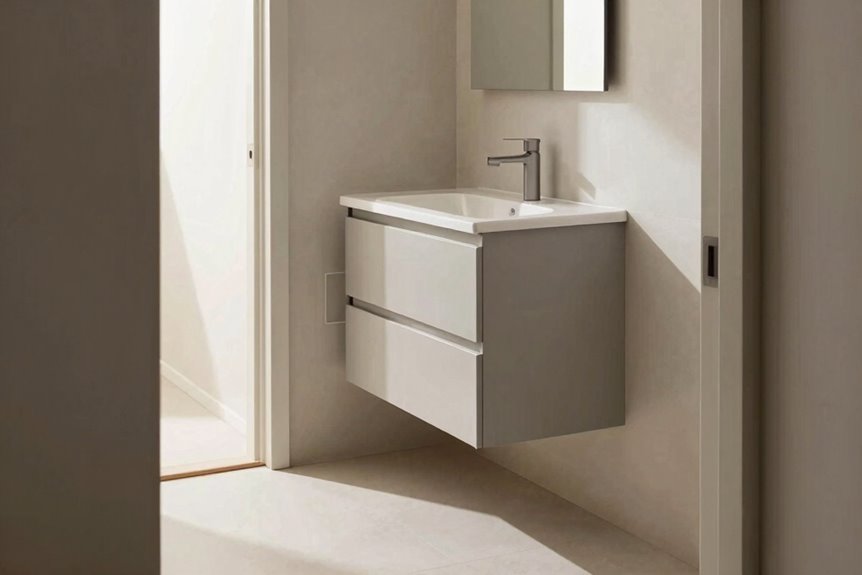
Tiles stretch the walls, but bulky furniture shrinks them right back. Choosing a small vanity keeps traffic flow smooth and your bathroom feeling open.
What works in tight spaces:
| Vanity Type | Best For |
|---|---|
| 24″ W x 20″ D compact vanity | Functional storage without crowding |
| Floating vanity | Openness plus hidden storage |
| Pedestal sink | Maximum floor visibility |
| Wall-hung toilet paired with small vanity | Freed floor space and clear paths |
A 24-inch vanity in a powder room allows two people to pass without awkward maneuvering. Floating vanities lift off the floor, creating the visual illusion of more space. Pedestal sinks sacrifice some storage but provide significant floor visibility. Pairing compact fixtures together creates functional walking paths throughout the bathroom.
Add Floating Shelves Above the Toilet and Door
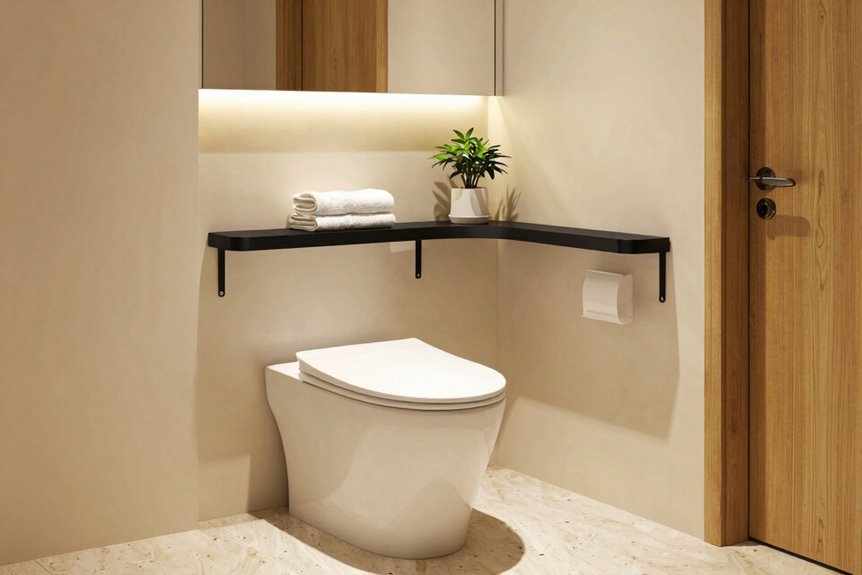
Where else can you squeeze out storage when every square inch counts? Floating shelves above the toilet and door transform dead zones into functional spaces.
These wall-mounted shelves add storage without consuming floor space. I installed three slim pine shelves, each 24 inches wide, above my tank last spring. Rolled towels and small plants now occupy this area, creating an open feel that maintains clear sightlines.
The vertical placement keeps pathways clear. I matched my shelves to the bathroom’s warm oak tones, so everything feels cohesive. You can stack them in tight columns or spread them wide.
Pair floating shelves with a narrow cabinet for additional storage capacity. Your bathroom remains functional and tailored to your needs.
Build Shower and Tub Storage Into Wall Niches
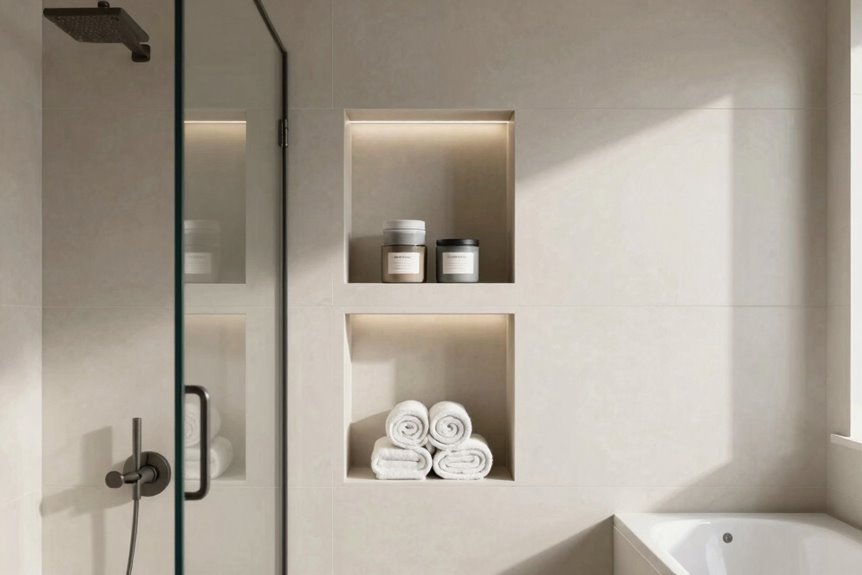
I’ve found that the best way to tame shower clutter is by carving storage right into the wall itself. Built-in shower shelving keeps your shampoo within arm’s reach, eliminating the need to reach for bottles on precarious ledges. A recessed tub niche above the bath stores bubble bath and candles without consuming floor space. When you integrate this wall storage at eye level, about 48 to 60 inches high, everything stays dry, accessible, and out of the splash zone.
Built-In Shower Shelving
Why fumble with wobbly caddies when you can carve storage straight into the wall? Built-in niches for shower storage keep everything right where you need it.
Plan niches about 12 inches wide and 24 inches tall. This width saves space while the height accommodates tall shampoo bottles. Stack them vertically when wall space runs tight. You’ll free up precious floor area and actually see what you own.
Choose flush, frameless openings. No chunky metal trim, no visual clutter. Just smooth tile sliding into shadow. The shower feels bigger and cleaner.
Before cutting, mark where your fixtures land. Blocking your valve or spraying water straight into your soap stash will compromise function. Proper placement ensures your shower works as intended.
Recessed Tub Niche
How often do you knock over a bottle while trying to relax in the tub? I used to do that constantly. Then I discovered the recessed tub niche.
These smart storage solutions carve space directly into your wall, not onto it. You keep bottles steady and reachable without sacrificing elbow room. I position mine about 12 to 18 inches above the tub rim for easy access to shampoo while soaking.
Want seamless style? I tile the niche to match surrounding walls. The eye keeps moving, and the clutter disappears. Just don’t skip the waterproofing. I slope the niche bottom slightly so water drains out, protecting the structure behind.
No more precarious balancing acts. Your bath products stay put, your floor stays clear, and water damage stays prevented.
Wall Storage Integration
Because I value floor space almost as much as hot water, I built storage right into my walls instead of piling stuff on top of them.
Wall storage through recessed shelving changed everything. I carved a 12-by-24-inch niche into my shower wall at chest height. Shampoo sits right there, no crouching, no clutter. Above the tub, I added another recessed shelf for candles and that book I never finish.
The key is to go vertical. I squeezed a slim 8-inch-deep cabinet above my toilet. It holds six rolled towels and nobody bumps their knee.
I picked beveled-edge shelves that echo my arched mirror. The storage disappears into the design. My floor stays clear, my eyes relax, and my tiny bathroom finally breathes. This approach works because it eliminates visual clutter while maximizing usable space.
Reclaim Counter Space With Recessed Medicine Cabinets
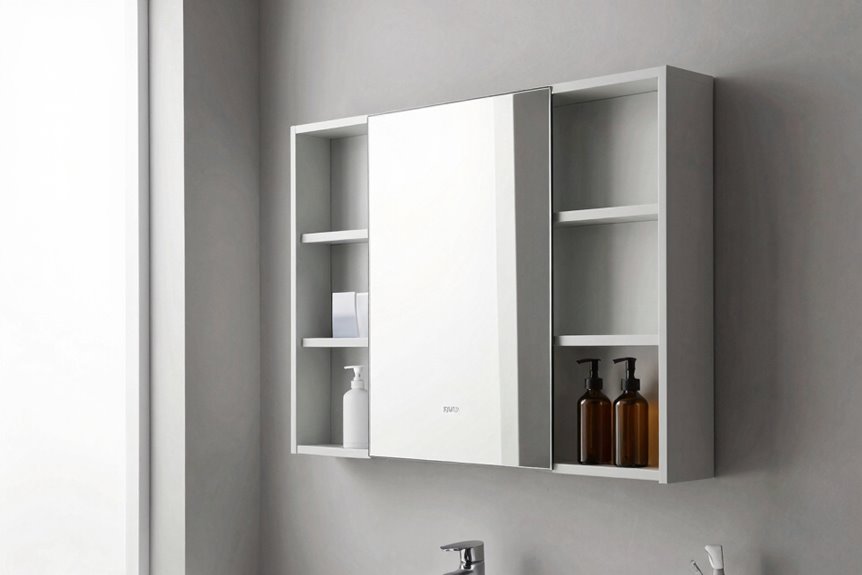
Every morning, I fight the same battle: my toothbrush, face cream, and that one rogue hair tie competing for two inches of counter space. Sound familiar? I’ve found my answer in recessed medicine cabinets.
These gems store everything inside your wall, not on top of it. Suddenly my vanity went from cluttered chaos to calm. I’m talking razor, contact case, even my jade roller; all tucked into roughly four inches of wall depth.
Mine spans 24 inches wide with a mirrored front that bounces light around my tiny bathroom, making it feel like I’ve gained square footage. Installation needs proper wall framing, but a local contractor handled mine in under two hours.
Recessed medicine cabinets aren’t fancy. They’re practical storage that reclaims counter space and streamlines your morning routine.
Open Up Your Shower With Glass and Zero-Threshold Design
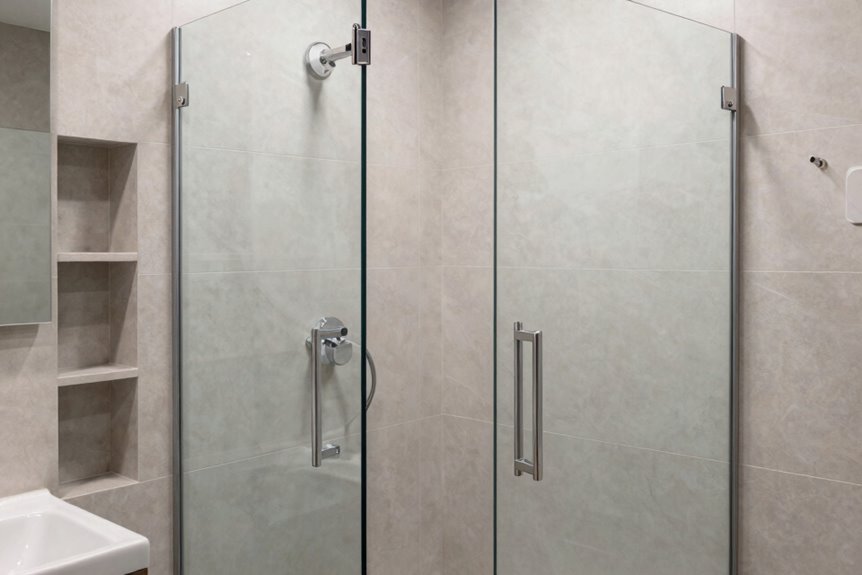
When I swapped my grimy shower curtain for a frameless glass enclosure last spring, my bathroom instantly felt twice as big without any renovation. Glass allows light to bounce around instead of being trapped behind fabric or frosted panels.
I ditched the raised shower lip next. That zero-threshold design eliminates stubbed toes and visual interruption. Your floor flows continuously, which makes your eye perceive more shower space than actually exists.
If your layout is tight, consider a curved glass corner unit. Mine measures 36 inches each way but feels roomy. Pair it with recessed wall niches for shampoo, and you get sleek storage that keeps clutter out of sight. Your shower becomes an open, airy retreat worth stepping into.
Mount Your Toilet on the Wall to Reclaim Floor Area
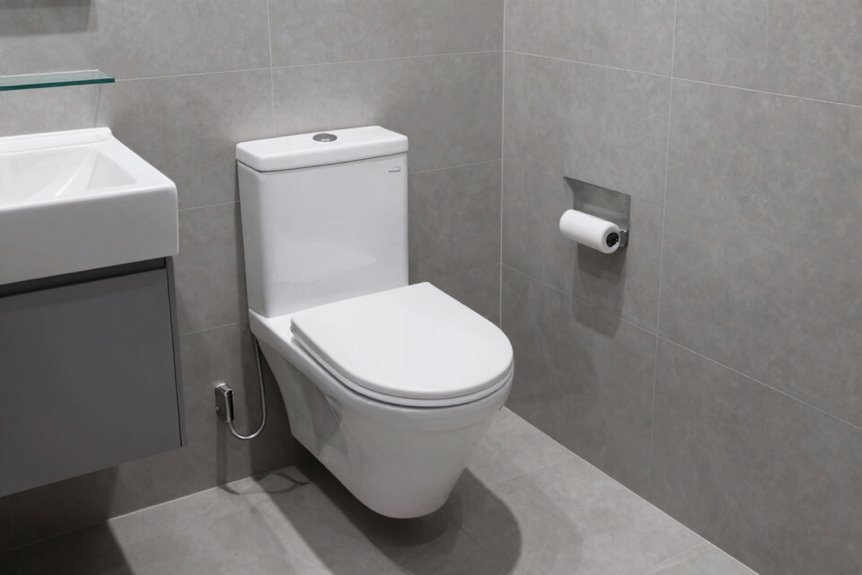
Few purchases have transformed my cramped bathroom as dramatically as swapping my floor-hogging standard toilet for a wall-mounted model. I gained precious floor space, about 9 inches of extra room, and suddenly my 5-by-8-foot bathroom didn’t feel like a phone booth anymore.
Swapping my floor-hogging toilet for a wall-mounted model gained me 9 inches of precious space—and suddenly my bathroom didn’t feel like a phone booth anymore.
Wall-mounted toilets offer several advantages:
- The hidden tank erases visual clutter, so my eye glides across clean tile instead of bulky porcelain
- I can finally mop underneath without gymnastics. No more mysterious dust bunny colonies accumulate in tight corners
- The streamlined silhouette makes my modest space feel larger and more open
One caveat: verify your wall studs can handle the concealed tank system before committing. I consulted a plumber friend first. That hidden hardware needs serious structural support. The breathing room I’ve reclaimed has genuinely transformed how I experience our shared daily bathroom space.
Maximize Vertical Bathroom Storage With Hooks, Rails, and Corner Shelves

I’ve found that walls hold far more potential than most of us realize. Three simple tricks can transform your cramped bathroom into a storage-savvy space: strategic hook placement, vertical rail systems, and corner shelf solutions.
Strategic hook placement keeps your towels within arm’s reach. Vertical rail systems turn blank walls into organizing solutions. Triangular corner shelves, often just 12 inches per side, fit those awkward angles precisely, making use of otherwise wasted space.
These vertical fixes keep your floors clear and your morning routine efficient. No more knocking over bottles or stepping around clutter.
Strategic Hook Placement
How often do you find yourself tripping over a towel puddle or hunting for a place to hang your robe? I’ve been there too, and it’s frustrating. Floating shelves and wall-mounted rails with hooks solve this problem.
Here’s what hooks do for your daily flow:
- No more soggy towels on the floor. Dry towels are ready every morning.
- Robe hangs within arm’s reach before you’ve had coffee.
- Everything has its home, so your space feels organized.
Place adhesive hooks inside shower niches and behind doors. They cost under $10 and hold 5 pounds each. Most people install them and immediately regret not doing it sooner.
Vertical Rail Systems
Where does all your bathroom stuff actually go? Mine used to crowd every surface until I discovered vertical rails.
I installed slim, corrosion-resistant rails, about 24 inches long, above my toilet. Suddenly my towels, robes, and accessories hung neatly, freeing precious floor space. This wall-mounted storage transformed my cramped bathroom without a single bulky cabinet.
I paired my vertical rails with a narrow wall-mounted cabinet for toiletries. The combo keeps essentials within arm’s reach but completely off counters. No more knocking over bottles while grabbing my toothbrush.
Choose rails with a slim profile, under two inches deep, so they don’t dominate your visual space. The clean, open feel makes even tiny bathrooms breathe easier.
Going vertical changes everything. Your floors stay clear, your stuff stays accessible, and you’ll actually enjoy walking into your bathroom again.
Corner Shelf Solutions
Why do we always ignore the corners? They’re just sitting there, waiting to rescue us from clutter. Corner shelves are space-saving solutions that many people overlook.
- Imagine stepping into your shower and actually finding your shampoo without a balancing act
- Picture your tiny bathroom feeling twice as spacious because nothing crowds the floor anymore
- Feel the relief of finally having a spot for every little thing that used to wander
I installed floating corner shelves above my toilet last month. Suddenly I had room for candles, extra rolls, and that plant I kept killing on the sink. Pair them with slim corner cabinets or shower niches, and you’ve built vertical storage without shrinking your space. Corners aren’t awkward; they’re opportunities we forgot to use.