Actively aerated compost tea is a water-based, oxygen-rich culture packed with beneficial microbes that you brew yourself and apply as a liquid soil amendment. The catch is that without constant bubbling, the aerobic organisms suffocate and anaerobic pathogens take over, turning plant food into plant harm. A clean 5-gallon bucket, an air pump pushing 0.05–0.08 CFM per gallon, and one to two cups of finished compost are the core of every batch; the pump runs for 24–36 hours, and the tea goes onto soil or leaves within four hours of shutting off the aeration.
What Actively Aerated Compost Tea Actually Is

Actively aerated compost tea is a water-based, oxygen-rich culture packed with beneficial aerobic bacteria, nematodes, fungi, and protozoa. The "actively aerated" part is what separates it from a bucket of compost left to steep on its own. Oxygen keeps the biology alive and anaerobic pathogens out. Without that steady bubbling, the microbes burn through available oxygen fast, conditions shift, and the wrong organisms take over.
The point is to amplify a small amount of quality compost into a liquid you can spray or pour, stretching a little material across a lot of soil. A good batch puts thousands of beneficial microorganisms to work. Some bind and break down toxins in the soil. Others cycle nutrients plants can actually use, or colonize leaf surfaces to outcompete disease-causing organisms. The payoff for the effort is soil that needs less synthetic fertilizer and plants that handle stress better.
The brew needs five things: an inoculant of beneficial bacteria and fungi, food sources for those microbes, dechlorinated water, oxygen, and agitation. Skip the aeration and you are not making AACT. You are making something else, and your soil will know the difference.
Prepare the Brewing Vessel

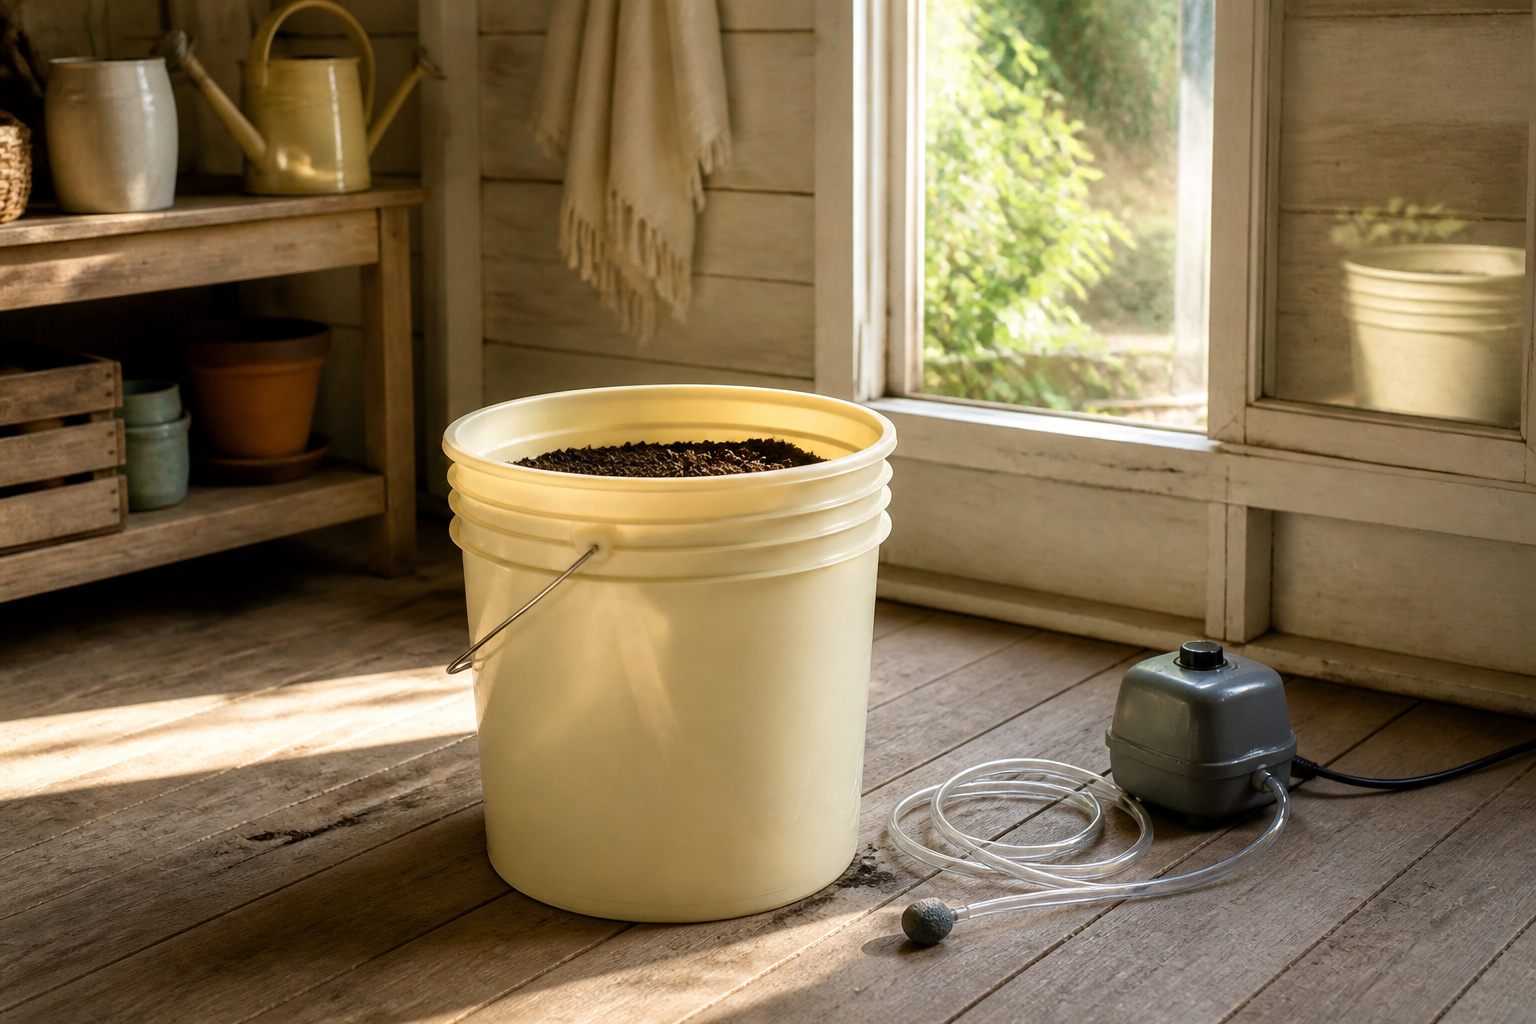
A clean 5-gallon bucket starts every batch I brew. Chlorinated tap water will kill the microbes before they ever get a chance to multiply, so dechlorination comes first: either let tap water sit uncovered for 24 hours or run it through a carbon filter. The 24-hour wait works for standard chlorine, though some municipalities now use chloramine, which does not dissipate on its own. Calling your local utility to ask what they use saves a ruined batch.
Water temperature matters more than most beginners expect. The sweet spot sits between 55–80°F; outside that range, microbial growth stalls or the wrong organisms take hold. Fill the bucket most of the way, leaving a few inches of headspace at the top. The aerator will kick up serious bubbling once it runs, and foam has a way of finding every gap you left too tight.
Fill the Tea Bag
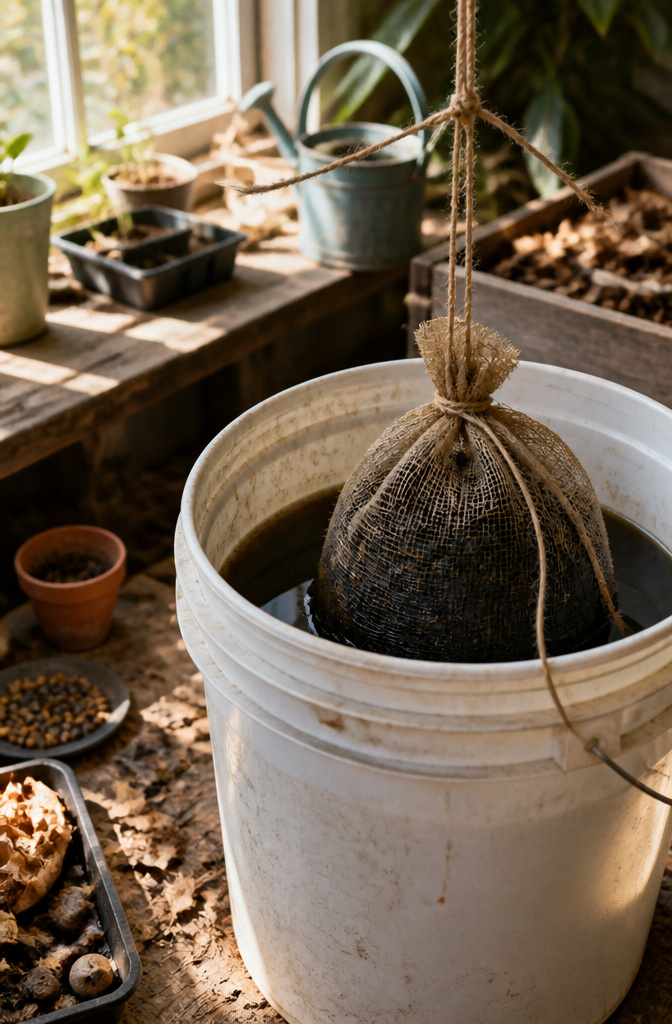
Finished compost is what turns water into something worth spraying, not just the fact that you stirred it. One to two cups of fully finished, fully decomposed compost goes into whatever bag you have: an old pillowcase, a nylon paint strainer, a burlap sack, or one of the dedicated compost tea bags sold for this. The bag needs to breathe enough for microbes and nutrients to move through, but not so openly that solids escape into the bucket.
If your own compost still smells sharp or looks only half-broken down, skip it. Worm castings are the reliable fallback here. They cost more than free backyard compost, but they save a batch that would otherwise grow the wrong biology or simply go flat. Most brewers use castings alone or mixed with compost; either way, the finished, stable material is what matters. Tie the bag with enough string left to suspend it in the water like a teabag, then move on to feeding the microbes.
Add Microbial Food

Unsulfured molasses is the cheap starter most people reach for first: ¼ to ½ cup in a five-gallon batch feeds bacteria with simple sugars they can process immediately. Fish hydrolysate works too, and it brings nitrogen along with the proteins. Kelp meal and alfalfa meal cost more per pound but add micronutrients molasses cannot touch, which matters if your soil test already shows low boron or magnesium.
The tea is not just a rinse. Without food, you move microbes from the compost to the water and nothing multiplies. The biology wakes up, eats, and reproduces during those hours of bubbling, which is what separates compost tea from compost water. I mix molasses with a splash of kelp when I have both on hand, since bacteria and fungi favor different foods and most gardens need both working. Some growers skip the commercial products entirely and rely on their compost plus whatever nutrient-rich weeds or seaweed they can gather. That route works if your inoculant is already diverse; if you are buying bagged compost of unknown age, the molasses is worth the four dollars.
Aerate the Mixture
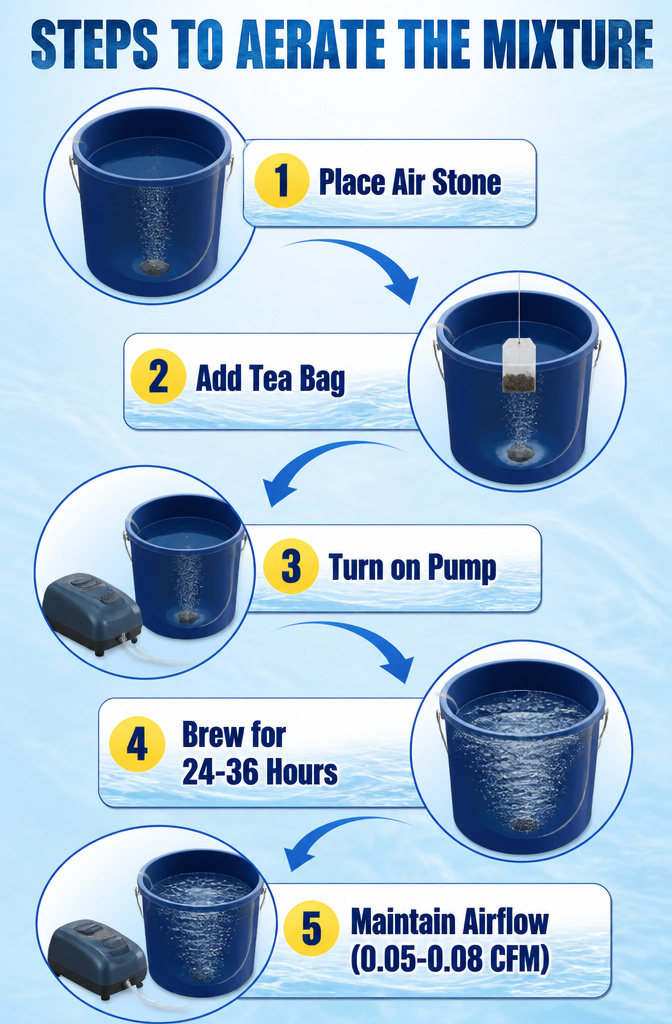
Place the air stone or bubbler on the bottom of the bucket and keep the tea bag suspended above it, not resting on top. The first time I set up a brew, the bag sat right on the stone and cut the airflow nearly in half before I noticed.
Kick on the pump and run it 12 to 48 hours, with 24–36 hours as the sweet spot for most batches. You will hear the difference between a working brew and a struggling one. Vigorous bubbling sounds like a low simmer, not a gentle hiss; the surface breaks constantly with small rolling bubbles rather than sitting flat with occasional burps. The water should look alive, turning over from bottom to top in a slow boil without heat.
The pump needs to push 0.05–0.08 CFM per gallon of water to hold off anaerobic bacteria. Fall below that range and the mix can shift from oxygen-rich to oxygen-starved, letting harmful microbes take over. That constant churn is what separates actively aerated tea from the stagnant kind that can do more harm than good in the soil.
Use the Tea Immediately

The microbes in your compost tea start dying within four hours of shutting off the pump. Oxygen is what kept them alive during brewing, and without it they suffocate faster than most people expect. Use the tea within four hours and worry less about getting the dilution exactly right.
A basic watering can works fine for soil drenches. For foliar feeding, strain the tea through fine mesh first, then load it into a pump sprayer. Unstrained compost will clog nozzles halfway through the job, usually right when your arms are tired and the tank is still half full.
Dilution ratios vary. Some gardeners dilute 1:1 with clean water; others go as light as 1:10. The tea also works straight from the brewer. What matters more than the ratio is getting it onto the plant or soil while the microorganisms are still active and ready to colonize. Apply to damp soil or in the evening so they are not immediately baked in direct sun.
What AACT Does for Soil and Plants
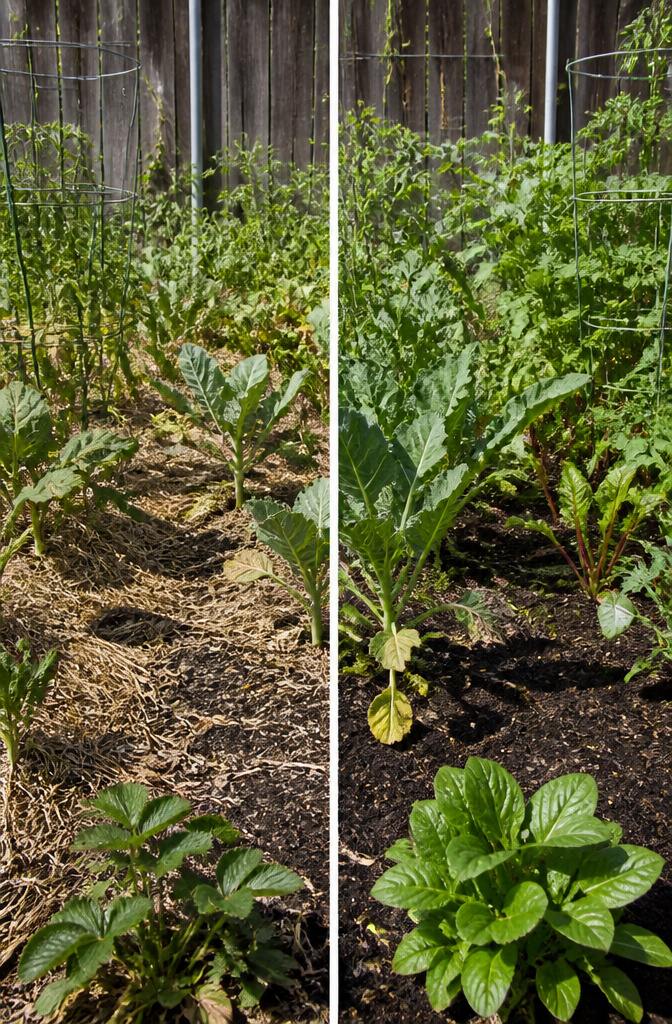
Actively aerated compost tea puts the biology already in your compost to work in liquid form, and the shift from solid to brewed changes what the soil can actually use. The microbes in a finished batch break organic matter into minerals plants can take up right away, so nutrients become available in a form roots can absorb rather than sitting locked in the soil. That dissolved state matters for renters and small-space growers especially, because a single bucket of tea can cover what would otherwise take hauling bags of compost across a whole yard.
The moisture retention is what sold me on keeping it in the rotation. Soil treated with compost tea holds water more evenly, which means less wilting between waterings and less panic during a hot weekend away. Over a season or two, the structure improves as fungal hyphae and bacterial colonies build aggregates that sponge up rainfall instead of letting it run off.
Disease resistance comes from population pressure more than any single organism. Beneficial microbes colonize leaf surfaces and root zones, competing for space so pathogens struggle to establish. It is not a replacement for good cultural practices, but gardens fed regular applications typically show fewer problems and rebound faster from stress like drought or transplant shock. The reduced need for chemical fertilizers follows naturally: when the soil food web is doing the work of making nutrients available, supplemental feeding drops to a maintenance level rather than a rescue habit.
Why Aeration Makes or Breaks the Batch
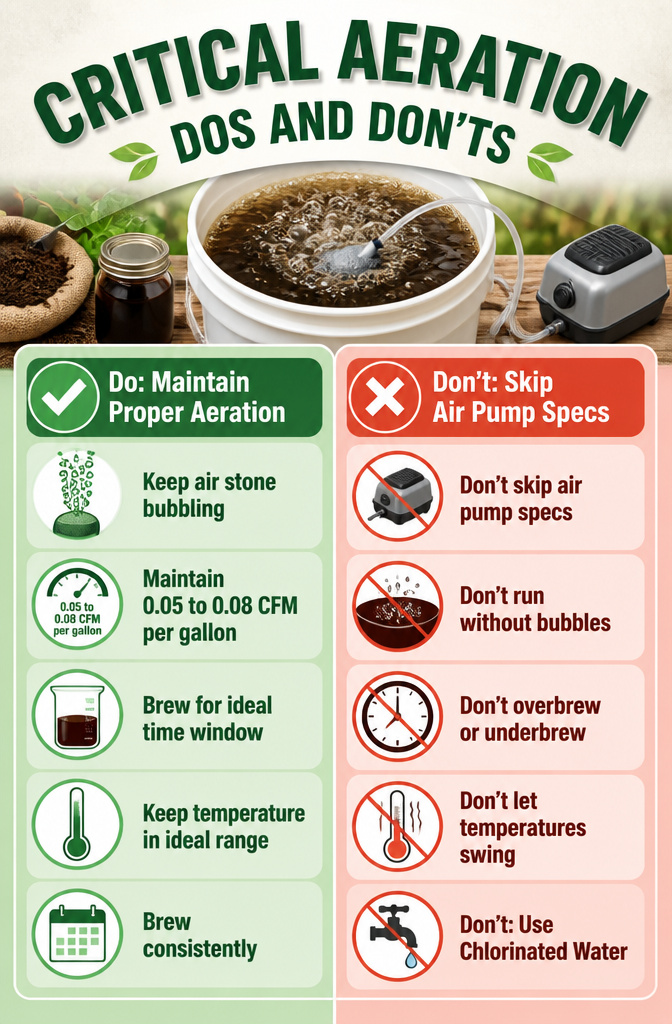
Oxygen separates compost tea from a weak broth of dissolved nutrients. Without steady aeration, the same microbes that feed your soil suffocate and die off, replaced by anaerobic bacteria and pathogens that produce sour compounds and smells no plant wants near its roots. The air pump matters more than most first-timers expect; 0.05 to 0.08 CFM per gallon is the working range that keeps dissolved oxygen ahead of demand as microbial populations multiply.
Smell is the cheapest diagnostic tool you have. A batch that stayed aerobic smells earthy and faintly sweet, even with molasses in the mix. Sour, rotten, or sulfurous means anaerobic organisms won the race, and that tea belongs on the compost pile, not your garden. Pour it out well away from plants and start fresh. The sweet smell alone does not guarantee a microbial payload, which is why testing your first few batches with a soil biology screen removes the guesswork.
Application Methods and Timing
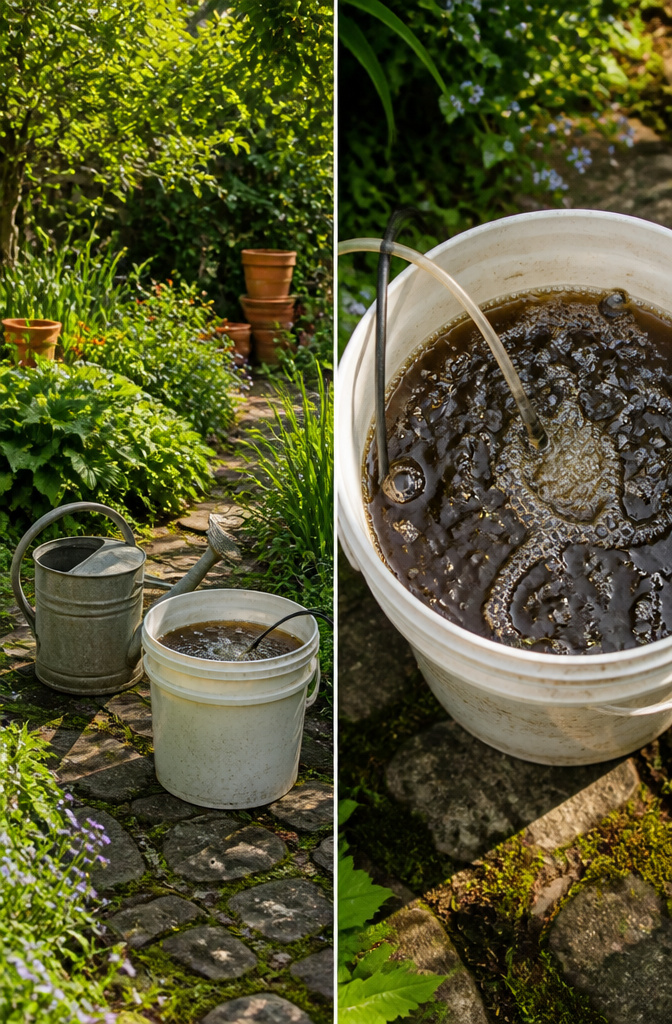
Soil drenches and foliar sprays do different work, and the choice depends on what the plant needs that week. A soil drench pours the biology straight to the root zone, where microbes colonize over time and build lasting structure. That is the move for steady, long-term health. Foliar spray puts nutrients and organisms on leaf surfaces, which plants absorb fast for a quick hit when something looks stressed or underfed. Apply every two to four weeks through the growing season for either method, and if you are spraying leaves, do it in early morning so the solution dries before sun intensity climbs and risks leaf burn. One caution worth keeping: foliar feeding gets more attention than the science fully supports, and some studies find little measurable benefit. The soil drench is the safer bet for routine use; save the spray for moments when a plant clearly needs fast help.
Mistakes That Ruin Compost Tea

Chlorinated tap water was the first trap I almost walked into. City water sits there to keep pipes clean, but those same chemicals flatten the microbes you are trying to grow. Rainwater or pond water works, or you can bubble tap water for a day ahead to let the chlorine gas off.
Inadequate aeration is the mistake I actually made. A small aquarium pump looks like it is doing plenty until you run the numbers: you want at least 0.05 CFM per gallon, and 0.08 CFM is better. My first setup was closer to a gentle simmer than a rolling boil, and I was basically watering dead microbes onto the beds. The tea should foam and churn; anything less and anaerobic pockets form, letting the wrong organisms take over.
Low-quality compost smells like trouble before you even brew. Finished compost should smell pleasant, not sour or ammonia-sharp. If your starting material is off, the tea amplifies that problem rather than fixing it.
Brewing too long or storing instead of using immediately kills the batch the same way. The microbes peak around thirteen hours, then crash as oxygen runs low. If the tea smells bad, any hint of ammonia or off odor, do not apply it. That smell is the practical signal most home brewers notice first, and it means you are holding plant harm, not plant food. Use it within a couple of hours of finishing, or start over.
Specific Food Sources and What They Add

Molasses is the cheapest feed in the lineup, and the one that pushes bacteria hardest. Unsulphured blackstrap runs about $0.50 a cup at farm stores in bulk, which matters when you are brewing every few weeks through a season. The sugars are simple enough that bacteria colonize fast, sometimes too fast; a heavy molasses batch can swing the biology toward bacteria-dominant tea that does less for fungi later in the soil food web.
Fish hydrolysate and kelp meal cost more per batch but pull the tea in a different direction. Fish hydrolysate, the cold-processed slurry of ground fish rather than the heated emulsion sold as fertilizer, feeds the slower microorganisms and gives fungi something to latch onto. Kelp meal does similar work, and switching the food source from batch to batch keeps the biology varied rather than training your soil toward one dominant population. Alfalfa meal sits somewhere between, with proteins and sugars complex enough to support diversity without the same bacterial spike molasses triggers.
Most brewers I have watched settle on a split: half a cup of molasses for a five-gallon brew, or dropping to a tablespoon or two of kelp with a few milliliters of fish hydrolysate when they want the fungal side thicker. The ratio is the judgment call, not the ingredient list.
Frequently Asked Questions
What is actively aerated compost tea?
Actively aerated compost tea is a water-based, oxygen-rich culture packed with beneficial aerobic bacteria, nematodes, fungi, and protozoa. The steady bubbling keeps the biology alive and anaerobic pathogens out, letting you stretch a small amount of quality compost across a lot of soil as a sprayable or pourable liquid.
How long does it take to brew compost tea?
Brewing takes 12 to 48 hours, with 24 to 36 hours as the sweet spot for most batches. The microbes peak around thirteen hours, then crash as oxygen runs low, so timing matters more than going longer.
What should I use for microbial food in compost tea?
Common choices are unsulfured molasses, fish hydrolysate, kelp meal, and alfalfa meal. Molasses feeds bacteria fast with simple sugars, while fish hydrolysate and kelp support fungi and slower microorganisms; switching sources between batches keeps the biology varied.
Can I store compost tea?
No, use it within four hours of shutting off the pump. The microbes start dying quickly without oxygen, and applying stale tea means watering dead or dying organisms onto your plants.
What happens if my compost tea smells bad?
A sour, rotten, or sulfurous smell means anaerobic organisms took over, and that tea should go on the compost pile, not your garden. Good aerobic tea smells earthy and faintly sweet, even with molasses in the mix.