DIY closet shelves are fixed or adjustable boards mounted to wall cleats inside a wardrobe space, built from MDF, plywood, or wire. The catch is that material choice dictates whether your shelves sag under winter bins or stay flat for years; 3/4-inch MDF runs roughly $80 for a standard reach-in but will belly downward under heavy loads unless you add a support bracket underneath. I learned that the hard way when I skipped pilot holes and split a cleat clean through, costing me another trip to the store.
Remove Existing Shelves

Everything comes out first so you can see what the walls actually look like. Pull the clothes, the bins, the shoes you forgot you owned. Once the floor is clear, the old shelving goes next. Wire systems usually lift off their brackets after a few screws; solid shelves need the hardware backed out too. Save any brackets or rods that are still straight, label which wall they came from, and toss anything bent or rusted. The holes left behind get filled with spackling compound and a light sand once dry, especially if you are painting before the new build goes in. What matters more is what shows up once the shelves are gone: water stains along the back wall, soft drywall near a bathroom stack, or mold blooming behind a shoe rack that never moved. Patch the holes, but fix the moisture first or the new shelves will sit on the same ruined surface. Uneven walls are normal in older closets; shims during the next step handle that.
Measure and Plan the Layout

Closet shelves look simple until you measure wrong and end up with a stack of boards that do not fit. Shelf depth runs 12 to 16 inches, with the deeper end worth it only if the closet is wide enough that you are not fighting past the edge every morning. Height spacing of 12 to 15 inches between shelves sounds generous until you try sliding a boot box in and realize 12 is tight.
The top shelf typically sits 84 inches from the floor, which puts it at the edge of comfortable reach for most people but clears the hanging rod below. If you are adding a rod, mark its height before you mark the shelf cleats. The two fight for the same wall space, and shifting one later means patching holes you already drilled.
Studs sit 16 inches apart in standard framing, and cleats need to hit them or the shelf will sag under anything heavier than folded t-shirts. A stud finder saves the guesswork; pencil marks directly below your intended shelf line keep the cleat placement honest so the board actually sits where you planned.
The top shelf in a closet is installed about 84 inches from the floor, middle shelves are frequently placed around 42 inches from the floor, and bottom shelves start at about 6 to 7 inches from the floor to provide enough clearance for footwear.
— Bob Vila
Those numbers are a starting point, not scripture. Shoes need less height than sweater boxes, and a closet used only for coats does not need a bottom shelf at all.
Cut Wood to Size

Three-quarter-inch MDF or plywood gives closet shelves enough stiffness to hold folded clothes without sagging over a five-foot span. The cleats that carry them are ordinary 1 x 2 x 8 boards, cut to the width and depth of your closet so the shelf sits flush against the back wall. Home Depot and Lowe’s will rip the sheet goods to width if you do not own a circular saw or table saw, though you will still need to cross-cut the cleats yourself. A miter box and hand saw handle that fine; skip the mitered corner joints the design blogs show off, since a simple butt joint behind hanging clothes is invisible and faster. If your walls are not square, cut a paper template first and trace it onto the shelf board, or you will end up with the same gap I saw in one build where the back corner ran half an inch shy of the wall.
Install Support Brackets

The cleats carry the whole load, so where they meet the wall matters more than the wood itself. A stud finder will locate the framing behind drywall; mark each edge with pencil so the full width of the stud is visible. Two-inch wood screws driven through the cleat and into the center of that stud are what keep a loaded shelf from pulling loose.
If the stud locations do not line up with your planned shelf positions, you have two options. Shift the shelf height to hit the studs, or drill a pilot hole through the cleat and wall, then set a drywall anchor rated for the weight you expect. The passages note that hitting at least two studs per cleat strip is the goal; anchors are a fallback, not the plan.
Leveling before you drill saves the grief of a slanted shelf. Mark a level line on the wall first, then align the top of the cleat to that line rather than trying to hold a level against the wood while you drive screws. Back cleats go in before the sides, with the side pieces butted against the back piece for a clean corner. Check for level one more time before the final screws go in; a laser level makes this easier, but a bubble level and patience works fine.
Install the Shelves
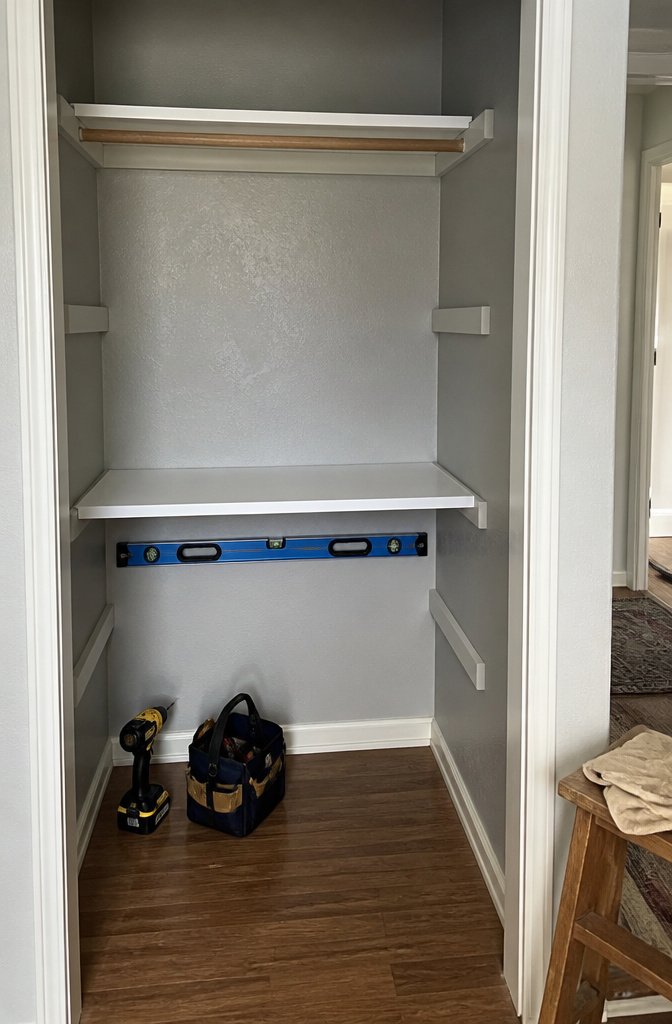
Resting a shelf onto its supports looks like the finish line, but the board can still shift every time you lift a box off it. Screw from above into the cleat or bracket and that movement disappears. Most builds use 1¼-inch wood screws or finishing nails driven through the shelf surface; the holes sit where folded shirts or bins will hide them anyway, so a little filler afterward is optional.
Level the shelf before you tighten anything. A four-foot level laid across the front edge catches the usual problem: one bracket sitting a hair lower than its neighbor. Tap the low side up with a shim slipped underneath, or back the screw out and reset the bracket. If the shelf rocks front to back, the board itself is bowed or the cleats are not coplanar. Flip the board end for end first; lumber often has a crown to it, and the other face may sit flat. Still rocking? Plane the high corner with a block plane or pull the cleat and shim behind it. Gaps against the wall mean the cleat or bracket is not quite flush to the stud; a shim behind the bracket arm pushes the shelf front tight without forcing the whole assembly out of square.
Start with the lowest shelf if you are stacking multiples. The one above blocks the drill for everything below it.
Finish and Paint

Raw MDF edges drink paint like a sponge, so prime them with an oil or shellac-based primer first. Latex primer leaves the surface rough forever because the water in it gets sucked into the fiberboard. Once that shellac base is down, any paint you like goes on top. Sand lightly between coats; the dust you wipe off is what would have become bumps.
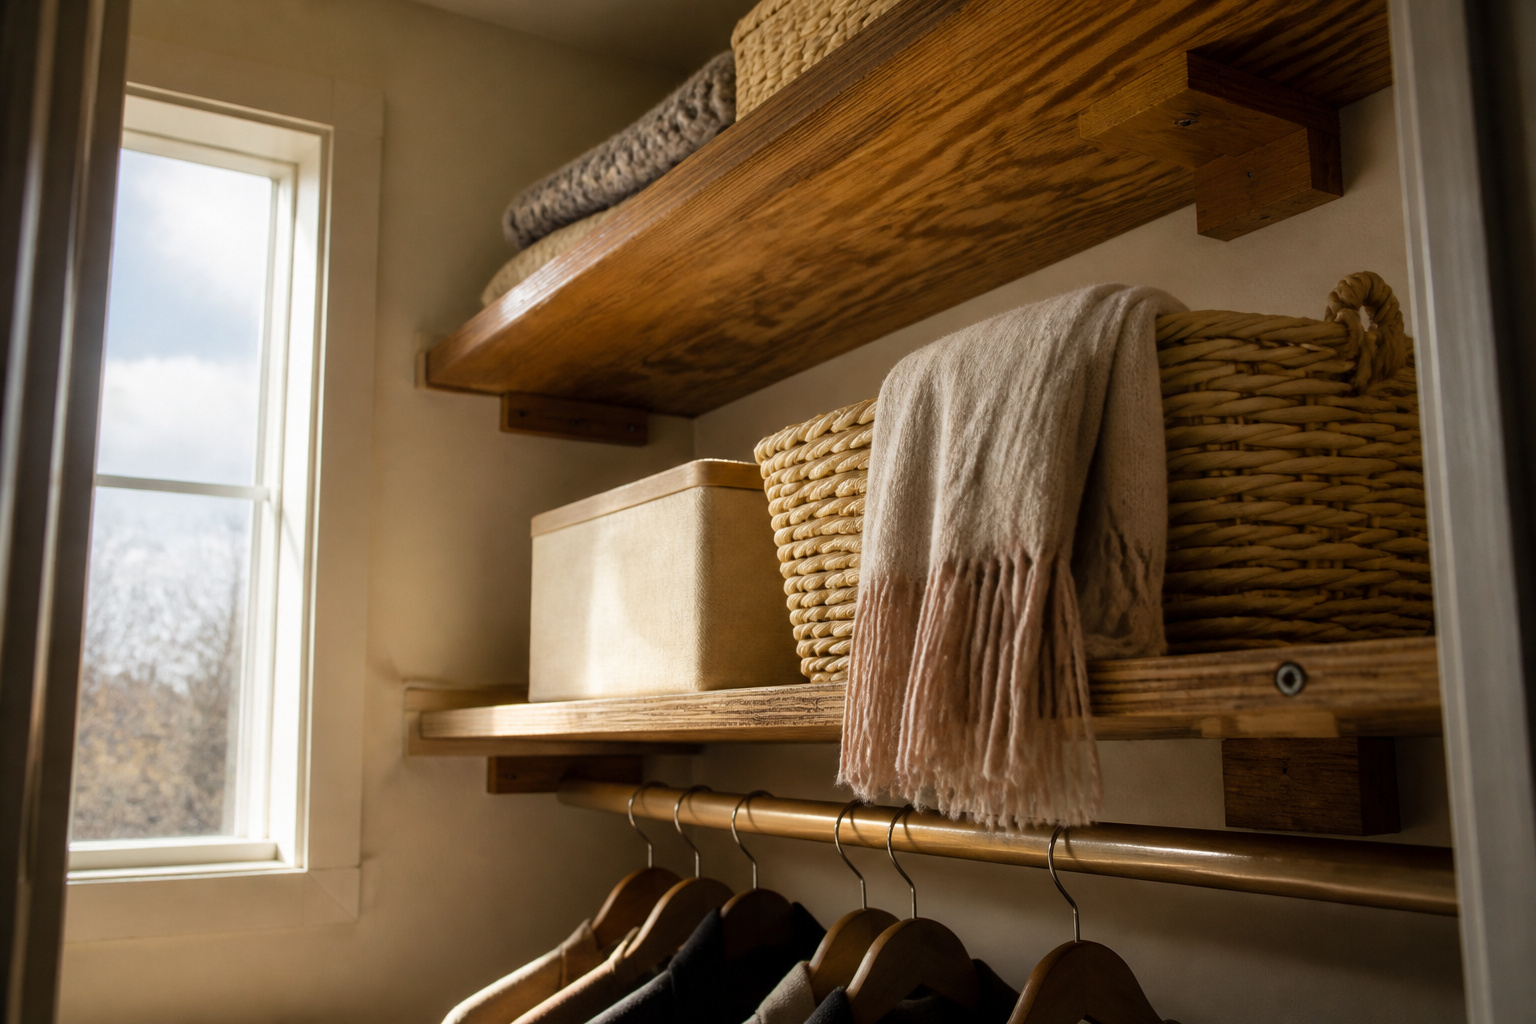
Stain works too, though water-based stain and sealer saved me the wait. Oil-based finishes need two or three days to dry and air out before the closet smells livable again; the water-based option let me build, finish, and install same-day. Golden oak was the tone I landed on, sealed with water-based polyurethane.
Give the final coat a full day before you load clothes back in. Paint feels dry in hours, but weight pressed against soft film leaves marks you will notice every morning.
MDF Shelves

Three-quarter-inch MDF is the thickness you will find on the shelf at every home center, and for closet duty that standard size is usually enough. The material is soft under a saw and takes paint without the grain fights you get from plywood, so a Saturday afternoon of cutting and brushing is genuinely doable. I have seen it used for the shelf top and for a thinner utility panel bottom braced underneath, which keeps the cost low and the weight manageable when you are hauling sheets up stairs.
The catch is what happens after you load it up. MDF sags under anything heavy, so folded sweaters and accessory bins are about the limit. Shoes, file boxes, or a stack of jeans on a wide span will belly downward over months. The edges also drink paint like a sponge and swell if you leave them raw, so sealing with primer or edge banding is not a finishing step you can skip. For a light-use closet where the goal is clean rows of T-shirts and scarves, it is the affordable choice. For tools, books, or dense storage, plywood or a support bracket underneath the span is the safer call.
Plywood Shelves

Plywood carries more weight than MDF without sagging, which matters once you start stacking shoe boxes or storage bins. Birch or maple plywood runs higher in cost, but the shelf survives a move or a reconfiguration that particle board would not.
The edge grain is the detail that sold me, reading through builds that left it exposed. A clean band of birch ply looks intentional against white closet walls, and maple warms the space without any stain. If the edge faces the room, iron-on edge banding hides the plies for a few dollars more, though I have seen more people skip it inside a closet where no guest studies the shelf ends.
A 3/4-inch thickness with a front strip glued and screwed on, the way Pete from DIY Pete frames his side shelves, turns a plain plywood panel into something that feels built-in. The strip adds rigidity and covers the edge in one move. For a 28-inch span, that extra framing keeps the shelf flat under a full load of winter bins.
Wire Shelving

Builder-grade closets almost always come with wire shelving already in place, and the complaints are familiar: small items tip through the gaps, folded stacks leave crease marks, and the whole thing flexes under a full laundry basket. That flex is real. A 12-inch deep wire shelf bows noticeably once you load past about twenty pounds of sweaters or linens, which happens faster than most people expect.
The material still earns its keep in two situations. In a rental, the existing wire shelf stays up without drilling new holes into walls you do not own, and taking it down later means filling a few small anchor points rather than patching a stripped stud. Wire also ventilates damp items better than any solid surface; gym clothes aired overnight or towels put away slightly moist dry faster with airflow above and below. For everything else, the frustration tends to win. Shoes tilt through the gaps, small bins need a flat base to sit level, and the visual noise of metal lattice reads as temporary even when it has been there for years. If you are keeping the wire, lay a sheet of ¼-inch hardboard across the span where you need a flat plane for bins or folded clothes. It lifts out for cleaning and costs less than replacing the whole system.
Adjustable Shelving

Shelf pins and bracket standards are the hardware that makes a closet shelfing system actually useful long-term. A fixed shelf set to the height of toddler sweaters becomes useless by middle school, and the small metal holes or vertical rails let you raise or lower a board in ten minutes without touching a saw. The tradeoff is visible hardware. Bracket standards run the full height of the wall and read as industrial; shelf pins hide better but need precisely drilled holes that must stay true over years of adjustment. For a kid’s closet, I would take the bracket standards every time. The vertical rails look busy, but a growing wardrobe outgrows a clean aesthetic fast, and being able to drop a shelf for boots in October then lift it for sandals in April pays back the ugliness. Pine boards with a basic bracket standard kit run roughly the same material cost as fixed shelving plus the hardware, about fifteen to twenty dollars more per shelf position. That is cheap flexibility.
Built-In Shelving

Built-in shelving turns the closet itself into finished architecture instead of furniture shoved inside. The shelves wrap corners, merge at joints with router-cut T-shaped interlocks for a seamless transition, and hide every support behind face frames so the whole thing reads as one solid unit.
That seamless look costs you weekends and precision. A face frame of 3/4-inch MDF or matching plywood strips covers the front edges and the cleats behind them; for 3/4-inch shelves on 2-inch cleats, the math works out to 2 3/4-inch strips nailed flush. Without that frame, you are staring at plywood edges and screw holes every morning.
Walk-in closets are where this pays off. The shelving becomes walls, defines zones, and lets you cut shelf depth down to a foot instead of the standard two feet so the space actually feels larger when you walk in. Side shelves that wrap the corners need those T-joints and pilot holes first; brad nails hold them, and a center L-bracket on any span longer than your arm keeps the long top shelf from sagging under linens.
The downside is commitment. You are not unscrewing this when you move. Renters should stop reading here and skip to the bracket-mounted options.
What This Costs

A standard reach-in closet built with MDF or basic plywood runs about $80 in materials, assuming you already own a drill, level, and saw. That covers the shelf boards, 1-by-2 MDF strips for the front edge and frame, wood screws, primer, and paint. Radiata pine plywood sits at the same budget tier and cuts cleaner, though it adds maybe ten to fifteen dollars depending on your Home Depot’s current stock.
Upgrading to furniture-grade plywood or cherry only makes sense if the shelves will hold real weight, like tools or heavy storage bins. For clothes and shoes, the cheaper boards hold fine, and the money stays in your pocket.
Adjustable hardware changes the math entirely. Shelf pins, metal standards, and extra drilling time can push the project past $120, and the flexibility is only worth it if your closet contents shift season to season. Premade wire systems from the big-box store run in the same neighborhood, but they look like exactly what they are and flex under anything heavier than folded shirts.
Tools you lack will cost more than the wood. A miter saw or circular saw is non-negotiable for clean cuts, and a stud finder keeps your screws in something solid. Borrow before you buy; most people know someone who owns these, and the $80 material budget assumes you are not amortizing a new drill.
Tools That Matter

A $20 stud finder is the one tool that paid for itself twice over the first time I used it. I had marked what I thought was a stud, drilled, and hit nothing but drywall. The finder kept me from turning that into a row of patched holes.
Here is the full list, with notes on what you can skip or borrow:
- Drill – Non-negotiable. The sources all call for a power drill or screw gun to drive 2" wood screws into supports.
- Saw – Skip if you buy pre-cut lumber. One source used a miter box; another used a miter saw or table saw. Home Depot and Lowe’s will cut plywood to your dimensions for free or cheap.
- Stud finder – That $20 model is enough. Magnetic stud buddies also work if you already own one.
- Level – A small level works; a laser level is nice if you have access to one.
- Tape measure and pencil – You need both, and you will need them more than once.
Rent the miter saw if you are cutting your own boards. For a single closet, buying one does not make sense unless you already have a list of projects waiting.
What I Got Wrong the First Time

The cleat split the second I drove the screw home. No pilot hole, because I was trying to save five minutes, and that 1×2 pine was never going to take a screw that close to its edge. I ended up buying two extra cleats at $3.18 each and starting over.
The wall looked square, so I trusted it. It was not square. The back cleat sat flush at one end and gapped nearly half an inch at the other, which meant the side cleats had to be shimmed or recut. I recut. Another trip to the saw.
I also painted everything before I test-fit the shelves. The melamine boards slid in fine, but the painted cleats had swollen just enough to bind. Drill pilot holes, check the wall with a carpenter’s square, and fit before you finish. The two coats of primer I had to sand off taught me that last one.
Frequently Asked Questions
What materials do I need to build closet shelves?
Three-quarter-inch MDF or plywood for the shelves, 1 x 2 boards for cleats, two-inch wood screws, and primer or paint to seal the edges. You will also need a drill, stud finder, level, and tape measure; Home Depot or Lowe’s can rip the sheet goods to width if you do not own a saw.
How do I install closet shelves?
Measure and mark cleat locations along level lines, locate studs with a finder, then screw cleats into the framing with two-inch wood screws. Rest the shelf boards on top, check for level, and secure them from above with 1¼-inch screws or finishing nails so they cannot shift.
What is the best height for closet shelves?
The top shelf typically sits 84 inches from the floor, middle shelves around 42 inches, and bottom shelves start 6 to 7 inches up to clear footwear. Leave 12 to 15 inches of vertical space between shelves, but adjust based on what you are storing; boot boxes need more room than folded shirts.