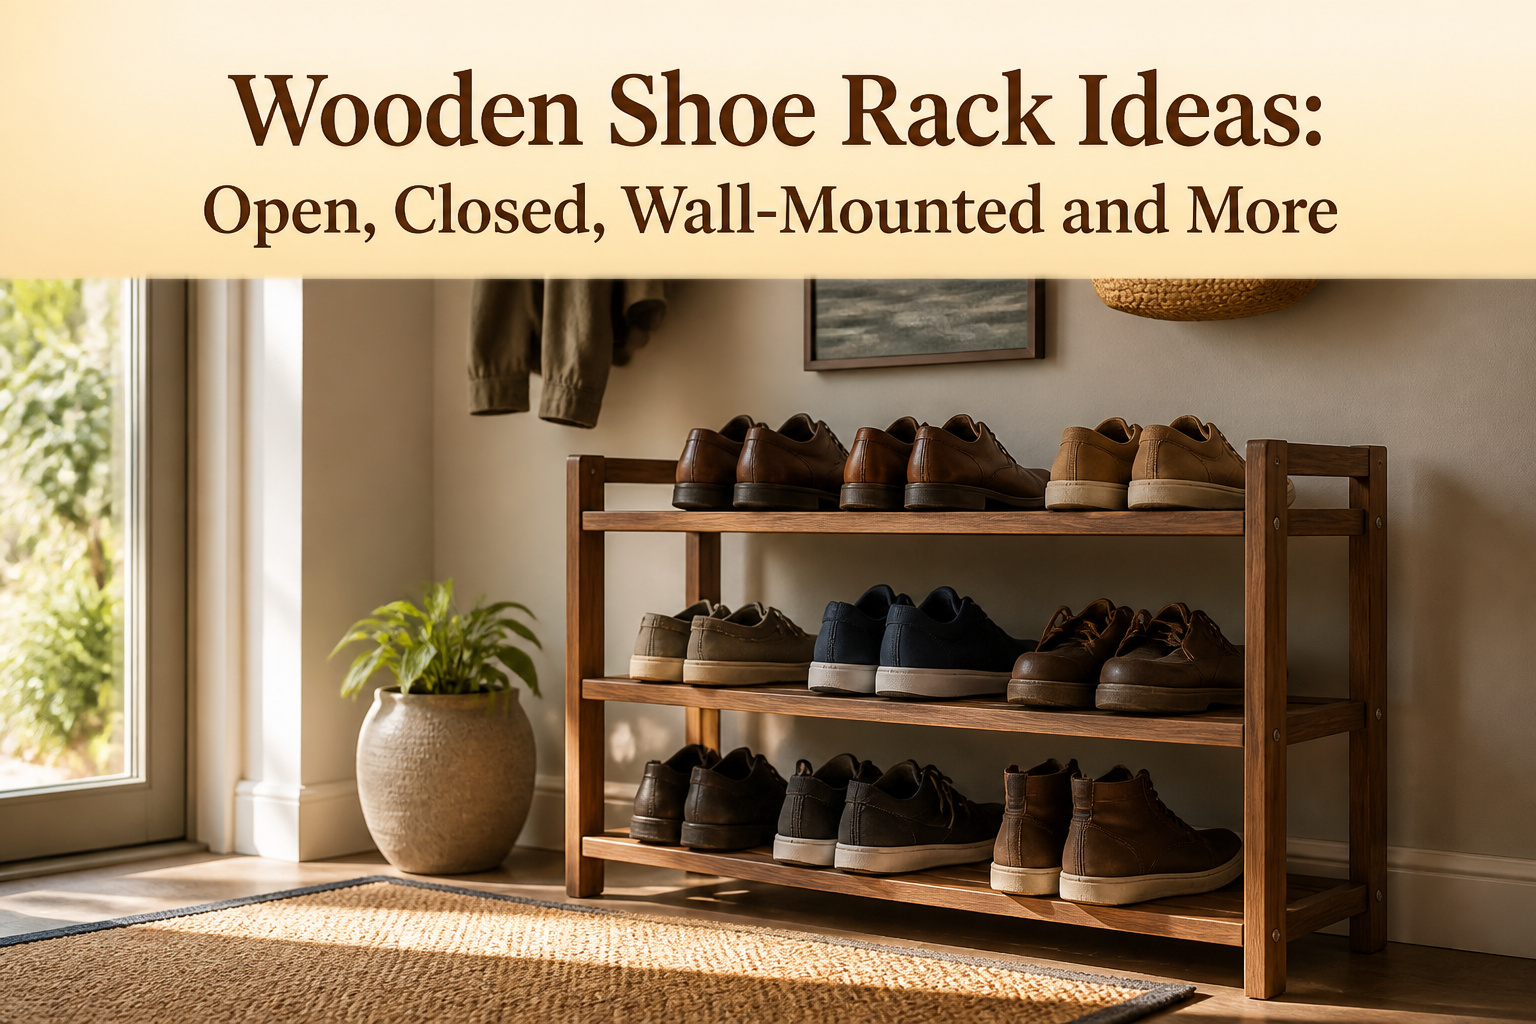
A wooden shoe rack is a piece of storage furniture built from timber to hold footwear off the floor, but the right choice depends on whether your shoes are damp from daily wear or tucked away for months. Open slatted designs let leather dry and cost less than closed cabinets with hardware, yet they leave every scuff visible to anyone walking through the entry. The IKEA Ställ cabinet, barely seven inches deep, fits narrow hallways where a bench would block the door swing.
Open Shoe Racks

Open racks earn their place by letting you see and grab shoes without a door in the way. Most pairs need 10 to 13 inches of depth, with men’s size 12 requiring about 13 inches to keep the toe box from hanging off the front rail. That airflow matters more than people think: leather holds moisture from morning dew or sidewalk puddles, and a closed box turns that into odor faster than the shoes can dry. Wood slats help, but only if the rack itself sits open to the room.
Daily-use shoes are where open storage pulls ahead. The pair you grab every Monday morning benefits from being visible at a glance and reachable without unlatching anything. Closed cabinets make more sense for seasonal storage, keeping dust off the boots you will not touch until November. The tradeoff is what sits in plain sight. Shoes left in a heap read as clutter fast, and any pet prone to chewing finds open racks conveniently accessible. A slatted wood design costs less and weighs less than a closed unit with panels and hardware, which matters if you are setting this up in a rental hallway and might move it again in a year.
Closed Shoe Cabinets

Shoes sitting behind a closed door stay dust-free, which matters more than I expected before I stored a pair of leather boots through a dry summer and found them still wearable in October. The tradeoff is airflow; damp sneakers shut inside a cabinet can mildew where an open rack would have dried them by morning.
Two options stand out for narrow entryways. The Akxomel Fluted Shoe Storage Cabinet measures 41.3"H x 25.6"W x 9.4"D and holds up to 15 pairs in flip-up compartments sized for both flats and bulkier sneakers. Its footprint is narrow enough to double as a console table, though the setup reportedly needs an extra set of hands and the engineered wood is not solid timber. The IKEA Ställ Shoe Cabinet runs smaller at 35.375"H x 37.75"W x 6.75"D, fitting 12 pairs in a tilt-out design that sits barely seven inches deep against the wall. Particleboard construction keeps the price down, and the flat front comes in white, oak, or black. Renters often hack it with new pulls or a added top, which I have seen done well and done badly; the base unit alone reads as cleaner than most attempts to dress it up.
For seasonal storage, closed cabinets win. For daily rotation, the hunting through compartments grows old fast.
Shoe Benches

A shoe bench pulls double duty in an entryway, giving you a place to sit while you lace up and the tiers underneath to drop the shoes into. The standard build runs two to three open shelves beneath a solid wood seat, which keeps the footprint tight while still holding a full household’s worth of footwear.
The question of whether a standard shoe rack can work as a bench comes down to the top and the joinery. A thin shelf or a plastic frame will collapse under body weight; you need solid wood across the seat and mortise-and-tenon connections or equivalent joinery that transfers load straight down without wobbling. If the rack you’re looking at has a wood veneer top over particleboard or snap-together hardware, plan on using it for shoes only.
For renters and first-time owners, this hybrid form solves the narrow-entryway problem where there is no room for both a bench and a rack. A 39.4-inch-wide unit at roughly 26.8 inches high sits low enough to tuck behind a door swing or serve as a slim console when you need the floor space back. The open mesh style lets dirt fall through, so sandals or flats on the bottom tier take the dust rather than the pair above them.
Wall-Mounted Racks

Wall-mounted racks keep shoes off the floor entirely, which matters when an entryway is too narrow for even a slim console or when closet floor space is already claimed by a laundry basket. A 46-inch-wide bin built from common boards can hold shoes vertically in a single row, while a rack made from one 1×3 board keeps everyday pairs flat against the wall without protruding. Both free up the footprint a standing unit would occupy, but the mounting hardware has to hit studs or solid backing; drywall anchors meant for picture frames will pull out under the weight of leather boots or wet sneakers.
Placement is the part that trips people up. Shoes need to lift out cleanly, so the rack should sit where a door swing won’t block access and where heads won’t bump into protruding toes in a narrow passage. Inside a closet, the back of the door is often dead space that works; in an open entry, a side wall keeps the collection visible but out of the traffic line.
Having a solid organization system can make your wardrobe feel like less of a Where’s Waldo? hunt.
That applies double when the rack is at eye level and every pair is in view. The trade is straightforward: you gain floor space and lose the tolerance for sloppy mounting.
Stackable Shoe Racks

Stackable units make the most sense when you are not sure how much space you will need six months from now. A single tier holds four to six pairs and sits inside a closet without any commitment to the wall. Once the pile by the door grows, you add a second or third tier directly on top. The interlocking pins or dowels keep the whole column from sliding, though on carpet the feet can sink slightly and lean after a few weeks. I have seen renters in apartments with slanted floors shim the bottom layer with a folded takeout menu and keep going.
The real advantage is that you are not locked into one footprint. A narrow closet might take two columns side by side; a wider entry could run a single row of three or four units along the baseboard. Bamboo versions resist the humidity of a mudroom better than pine, but the price jumps enough that I would only go there if the rack sits near an exterior door. For a dry hallway closet, the cheaper wood holds up fine.
Start with one tier and buy the same line so the joinery still matches when you expand. Mixing brands almost never works; the pin spacing differs by half an inch and the stack ends up wobbling.
Pallet Shoe Racks

Pallet wood gives you a rustic look for almost nothing, but the savings disappear fast if you skip the prep. I learned that the hard way on a hallway rack I built two summers back: the boards looked fine in the garage, then shed splinters every time my roommate grabbed her boots. Sand every surface to at least 120 grit, including the edges you think nobody touches, and budget for a real sealer, not just the leftover paint from another job.
The appeal is the simplicity. You are basically cutting a pallet in half, adding legs or a second tier, and calling it storage. A single standard pallet runs about 48 by 40 inches, so one yields a two-tier rack roughly 20 inches tall with the slats spaced for airflow. That is enough for six to eight pairs if you alternate toe-to-heel, or four pairs of bulkier sneakers laid flat.
What separates the finished piece from garage clutter is how you handle the gaps. Pallet slats sit unevenly; some are 3 1/2 inches wide, some closer to 5, and the spacing between them varies by whoever nailed it together. If you are storing heels or anything with a narrow point, lay a solid 1×3 across the back as a catch rail, screwed through from behind so the heads hide. Without it, shoes tilt and fall, and the rustic charm wears thin fast.
For renters, the weight is the real issue. A loaded pallet rack can hit 40 pounds easy, so wall-mounting is out unless you are into serious anchors. Keep it freestanding, keep it under 30 inches wide so it slides through doorways when you move, and treat the feet with the same sealer as the shelves so they do not wick floor moisture and stain the finish.
Shoe Storage Towers
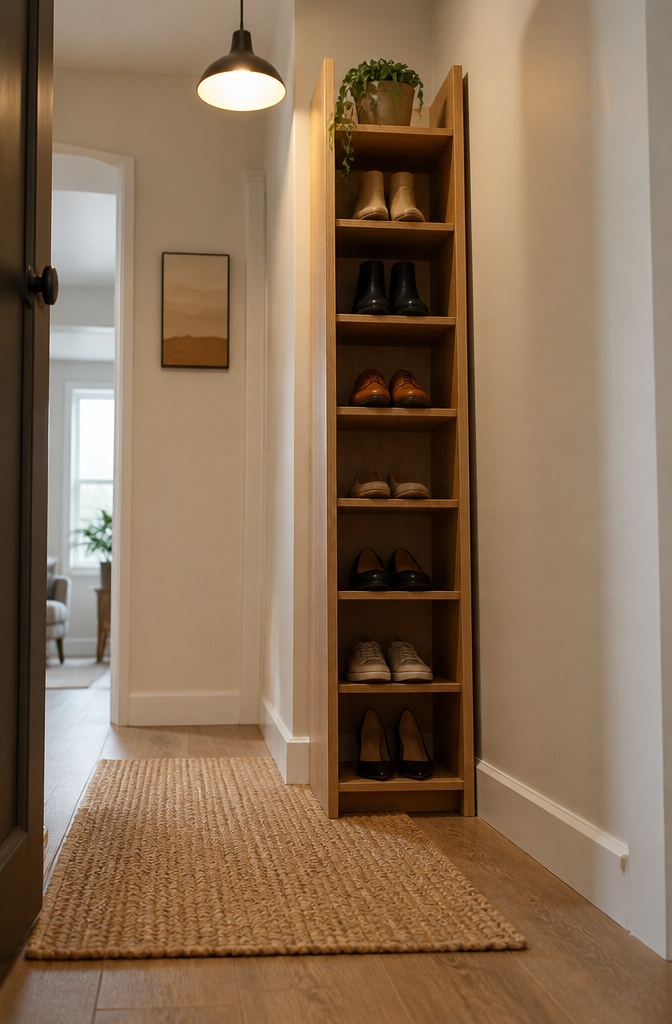
Vertical storage makes sense when floor space is tight but the shoe collection keeps growing. A tower racks pairs upward instead of outward, and the Yamazaki 6-Tier Shoe Rack is the one that keeps coming up for this job. It measures 9.84 inches deep by 25.98 inches wide by 34.25 inches high, holds up to 20 pairs, and still fits in a hallway without turning it into an obstacle course.
That footprint is the real tradeoff. Ten inches of depth is less than most shoes are long, so the rack sits close to the wall and the pairs angle slightly or overhang. The width stays under two feet, which matters in a rental where the doorway or closet front is your only real estate. Steel and wood construction keeps it light enough to move when the lease ends.
The catch is the open tiers. Debris falls straight through to the pair below, so boots with caked mud or shoes shedding grass clippings need a mat underneath or a quick brush-off first. For a family dumping daily-wear shoes in one spot, this tower handles volume better than a bench, but it is not the whole closet solution. Seasonal pairs still need a closed cabinet or under-bed box somewhere else.
Under-Bed Storage

Seasonal rotation is where under-bed storage earns its keep. A single drawer measuring 5.87 inches high, 17.375 inches wide, and 29.125 inches deep holds up to 20 pairs, which is enough to tuck sandals away in October or boots away in April. The catch is height. Anything much over a low-profile sneaker starts fighting that 5.87-inch ceiling, so heels and most boots need to live elsewhere. I see the appeal of a pull-out drawer versus a lidded bin, especially in tight bedrooms where dragging a full container into the aisle just to grab one pair is its own kind of clutter. The tradeoff is movement: these can slide on hard floors when you pull, so they work best on carpet or with something grippy underneath. For renters in studios or small one-bedrooms, this makes sense when your closet is spoken for and your floor space is not.
Boot Racks

Boots eat up shelf height in a way sneakers never do. A standard wooden shoe rack leaves 14 inches of vertical clearance for most pairs, but a rain boot or work boot needs at least 18 inches, and a knee-high boot needs the full depth of the unit to stand upright without folding the shaft. I learned this after building a pine rack with 12-inch slots and watching my partner’s hunting boots flop against the wall every time the door closed.
For wet boots, the wood itself matters more than the design. Cedar holds up to damp leather better than pine, and a slatted base beats a solid shelf every time. Water pools on flat boards and warps them within a season. A simple grid of 1×2 slats with gaps between them lets mud and snow drip through onto a boot tray below.
Seasonal rotation is where most boot storage falls apart. I keep one tall rack near the door for daily wear and a second, simpler one in the back of the closet for off-season pairs. The closet unit sits lower, since boots stored flat don’t need standing height. Pairing a tall boot rack with a standard shoe bench covers the whole household: the bench handles daily sneakers, the tall rack handles the footwear that would topple it.
Shoe Storage Console Tables

A console table with three open shelves underneath merges entryway functions into one piece without eating floor space. The top holds keys, bags, and a small dish for whatever comes off at the door, while the shelves below sort shoes by wearer or by frequency. At roughly 25 to 40 inches wide and under a foot deep, these units fit the narrow strip most apartments leave between the door and the living area. The Akxomel Fluted cabinet, at 25.6 inches wide and 9.4 inches deep, is built for exactly this squeeze: a senior shopping editor keeps hers by the front door, using the two flip-up compartments for slim loafers and the open lower shelf for bulkier pairs, with a reed diffuser and trinket dish on top. The Rebrilliant 4-tier rack, wider at 39.4 inches but only 11.8 inches deep, served one user as a console behind a couch when she needed to reclaim space; its wooden top let it pass as furniture rather than storage. The tradeoff is openness. Dirt falls straight through mesh or slatted shelves onto the pair below, so solid bottoms or a quick vacuum schedule matter. Engineered wood keeps the price reasonable, though assembly usually wants a second set of hands.
Open vs Closed Storage

Airflow and sightlines split the choice in two. An open wooden rack lets damp sneakers dry and keeps the pairs you grab every morning right there in front of you. The catch is exactly that visibility: every scuff and every bit of dust stays on display, and pets or toddlers can redistribute what you left tidy.
A closed cabinet solves the clutter problem. Shoes stay dust-free behind doors, and the footprint reads as furniture rather than storage. The trade is ventilation. Damp boots sealed inside can mildew, and finding the right pair means opening doors instead of glancing down.
The deciding factor is which shoes live there. Daily rotation belongs in open storage; seasonal pairs you pull out twice a year earn the enclosed space. Floor space matters too. Closed cabinets run bulkier, so a narrow entry or a rental bedroom favors the wall-mounted open rack that keeps the floor clear.
Where to Place Shoe Racks

The spot where a wooden shoe rack lives changes what it needs to do. By the front door, shoes come off immediately and dirt stays out of the house, so an open slat design lets grit fall through instead of collecting in a tray you’ll forget to empty. Traffic flow matters here: the rack needs to sit where a dropping bag or a turned heel won’t knock pairs onto the floor, but still close enough that the step-in, kick-off motion feels natural.
Mudrooms are where wet shoes go to dry, which means the rack itself needs air circulation more than the shoes by the door. A closed cabinet in this spot traps moisture against wood and leather; I leave the front door location for open racks and put anything with a door in the closet instead. Inside a closet, shoes stay hidden and a closed rack keeps dust off pairs you wear once a month, but the trade is accessibility. If you have to open a closet, then a cabinet, then hunt for the right box, the system fails on busy mornings.
Open racks by the entry, closed storage in the closet is the split that has held up in every rental I’ve set up. The only exception is a narrow hallway with no mudroom and no closet near the door; there, a wall-mounted open rack keeps floor space clear and the traffic moving past it.
Solid Wood vs Cheaper Materials
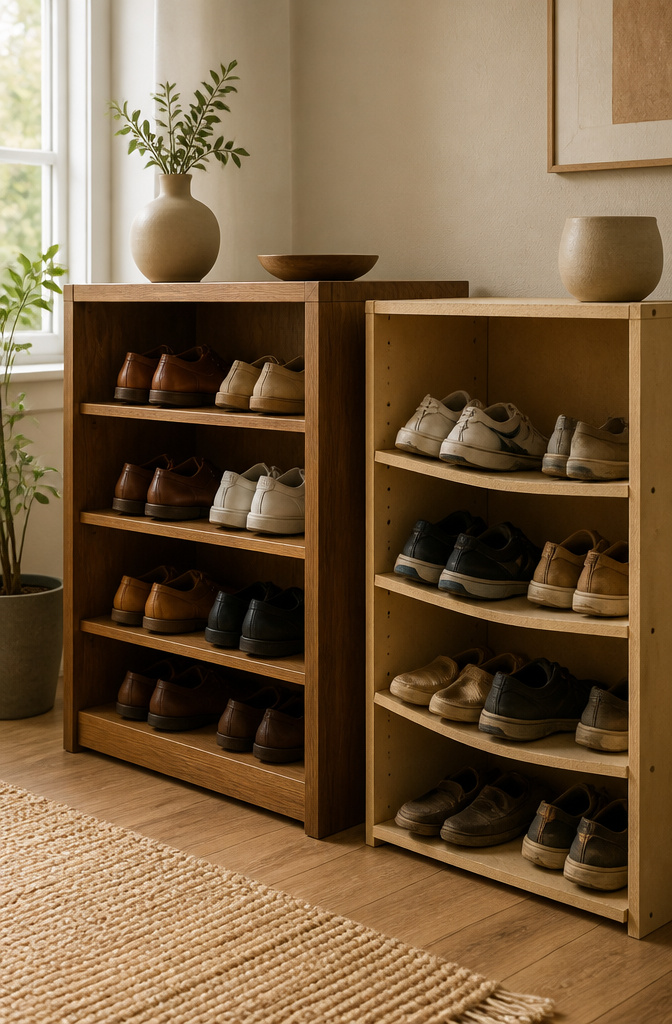
Most shoe racks under $50 are built from thin bamboo strips, wire mesh, or particleboard. These materials flex under weight, and the joints loosen within months of daily use. Solid wood with real joinery sits in an entirely different category: it supports weight evenly and stays tight for years.
The difference shows up first in the shelf itself. Particleboard and bamboo shelving sag over time, especially when loaded with boots or stacked pairs. A solid wood top with proper joinery, such as mortise-and-tenon construction, can handle the load without bowing. This matters if you ever want to double the piece as a bench; thin shelving or plastic construction will collapse under sitting weight.
Real joinery, not glue-only assembly, is what separates a rack that survives a move from one that falls apart in the hallway. Spot it by looking for visible joint work at the corners and by lifting the piece to feel its weight. Solid wood is heavier, but that heft is exactly what keeps it upright when you kick off muddy boots at the door.
DIY Plans and What Actually Works

A single 1×3 board is enough lumber for a slim wall rack that keeps everyday pairs off the floor without eating space. That is the beginner project that actually fits a Saturday: one straight cut, a few drilled holes, done before lunch. I have watched people talk themselves out of building because they picture a garage full of tools. A saw and a drill are the whole list here, and the second project from the same stable needs only one 2×2 and two 1x3s. Two boards, three tops, still beginner territory.
The bench builds are where I would have steered you next, since a seat with shoe storage underneath covers two jobs in one footprint. Mortise-and-tenon joinery holds weight without wobbling, which matters when you are sitting down to lace boots and the whole piece takes your weight plus a shove. That said, the open shelving beneath leaves dust where a closed cabinet would not; the tradeoff is access versus cleanup, and most mornings access wins.
Cost-effectiveness in these builds comes from buying exactly the lumber the plan names and stopping there. The one-board and three-board projects keep the receipt under what most spend on a pre-built flat-pack unit, and you skip the wobble those develop after a year of leaning. My own early attempt at a two-tier rack failed because I bought one-by material when the plan called for true two-by framing; the thinner legs bowed under a row of leather boots. Check the actual dimensions on the shelf tag, not the nominal name.
Frequently Asked Questions
Is an open or closed shoe rack better?
Open racks work better for daily-use shoes because damp sneakers dry faster with airflow and you can grab pairs without opening a door. Closed cabinets keep seasonal shoes dust-free but trap moisture, so they suit boots you only pull out a few times a year. The split that holds up in most homes: open storage by the entry for rotation, closed storage in the closet for off-season pairs.
How deep should a shoe rack be?
Most pairs need 10 to 13 inches of depth to sit fully on the shelf without the toe box hanging off the front rail. Men’s size 12 specifically calls for about 13 inches. Anything shallower and shoes overhang, which throws off balance and wears the heel edge.
Can I use a shoe rack as a bench?
Only if the top is solid wood and the frame uses real joinery like mortise-and-tenon connections that transfer load straight down. Thin shelving, particleboard, or plastic frames will collapse under body weight, so check the build before sitting. A proper shoe bench costs more than a basic rack but covers two jobs in one footprint.