Pre-soaking seeds for 8 to 12 hours in warm water reliably shaves days off germination for beans, peas, and squash, but small seeds like lettuce and carrot will clump and become impossible to sow. The real limit is timing: go past 12 hours and seeds split or ferment, especially in a warm kitchen. A soil thermometer is just as critical; pepper seeds sitting at 62°F will stall for weeks while air temperature feels fine.
Pre-soaking seeds

Hard seed coats on larger seeds like squash, beans, and peas slow water uptake enough that pre-soaking for 8 to 12 hours reliably shaves days off germination. The water should feel warm to the touch, comfortably warm but not so hot it burns, since temperatures above 95°F will damage the embryo. Room temperature water sits closer to the safe 75°F ideal for most vegetable seeds.
I have left sweet pea seeds in a jar overnight and planted them the next morning, but timing this wrong taught me the real limit. Go past 12 hours and the seeds start to split or ferment, especially in a warm kitchen. Four to six hours works for most types, though the harder coats on gourds and nasturtiums can take the longer soak without trouble.
Small seeds are the exception. Lettuce, basil, and carrot seeds clump when wet and become nearly impossible to sow evenly. The paper towel trick helps with larger ones: wrap them first so the towel sinks and keeps every seed submerged under at least an inch or two of water, since they drink more than you expect as they rehydrate.
Soaking is an easy way to soften a hard seed coat to spark germination.
What this means practically: set the bowl out in the morning, plant that same evening. Delay even a day and the swollen seeds dry out unevenly or mold before they reach soil.
Optimal soil temperature

Warm-season crops like tomatoes, peppers, and eggplant germinate best between 70°F and 85°F, while cool-season crops such as lettuce, spinach, peas, and carrots will sprout in soil as cool as 45°F to 50°F. The gap matters more than most gardeners realize. Soil temperature, not air temperature, is what actually signals seeds to start growing, and the soil can run 5°F cooler than the room around it even indoors.
A soil thermometer is the simplest way to check. I bought one years ago after starting pepper seeds in what felt like a warm basement, then waiting three weeks for sprouts that never appeared. The soil was sitting at 62°F. Peppers need that 70°F floor, and some varieties like habaneros prefer 75°F to 85°F. Below their range, seeds sit dormant and eventually rot. Push the probe two inches deep and check in the morning, before sun hits the bed.
Too much heat causes its own problems. Most seeds struggle above 80°F, and a heat mat cranked too high can cook them rather than coax them. When I start multiple varieties together, I pick a midpoint temperature that covers the spread. If one seed wants 70°F to 85°F and another wants 65°F to 75°F, 70°F handles both without pushing anyone into the danger zone.
High-quality seeds

The viability date printed on a seed packet is not an expiration date, but it is the first thing to check before you commit space in your tray. Lettuce and onion seeds lose their edge faster than bean or tomato seeds, and the gap only widens as storage conditions slip. I keep mine in a mason jar with a desiccant packet, tucked in the coolest cabinet of the kitchen, because the sources that test vegetable seeds every six months and ornamental seeds every nine months have convinced me that temperature swings and humidity do more damage than the calendar alone.
Last spring I sowed three-year-old tomato seeds anyway. They came up, but the tray looked like a staggered choir: first sprouts at day six, stragglers at day fourteen, and a blank quarter of the cells that never woke up at all. Fresh seed would have filled the tray evenly in half the time. The old seed was not dead, but it was not predictable, and a garden with limited space does not forgive unpredictability well.
Consistent moisture

Dry seeds in dry soil stay dormant, and the gap between "moist" and "soaked" is narrower than it looks. Soil kept like a wrung-out sponge hits the mark: damp through, but no water pools when you press a finger in. Overwatering invites algae on the surface, then fungal issues, then damping off, where soil-borne fungi rot the root system before the seedling ever shows. Underwatering is the quieter failure; small seeds dry fast, and the germination window simply closes.
A humidity dome or clear plastic cover buys time by trapping moisture while light still gets through. I remove mine once the seedlings are up, because the humid conditions that helped germination become a disease risk once stems and leaves are in the air. Propping the dome early, or lifting it entirely, helps if the soil surface stays wet too long. The dome is a tool for the waiting period, not the whole grow.
Light conditions

Most seeds germinate in darkness, which means burying them to roughly one seed diameter’s depth so light stays blocked until the sprout breaks through. Lettuce is the common exception among vegetables; it needs light and should only be pressed into the surface, not covered. Several flowers work the same way: coleus, petunias, snapdragons, impatiens, begonia, geranium, and a handful of others including ageratum, balloon flower, browallia, columbine, lobelia, nicotiana, osteospermum, poppies, and savory. For those, sprinkle the seed on top and press it in gently without adding soil on top.
One spring I planted lettuce at the same quarter-inch depth I used for my beans, thinking shallow was shallow enough. Nothing came up for two weeks. When I finally re-sowed and left the seeds almost exposed on the surface, they germinated in five days. The packet had said "surface sow," and I had treated it as a suggestion rather than a requirement. Now I check depth before I check anything else: half an inch or deeper for darkness lovers like watermelon and cucumber, a quarter inch or less for the light-dependent ones, and bare surface for lettuce and that list of annual flowers.
Right seed starting mix

A seed starting mix is not just potting soil in a different bag. The texture matters more than most gardeners expect: it needs to hold moisture around the seed without staying wet enough to rot it, and it needs enough air space that the emerging root can push through without fighting compacted dirt. Commercial mixes hit this balance with sphagnum peat moss or coconut coir, plus vermiculite and perlite for drainage and aeration. That sterility matters too. A bag of fresh seed starting mix is formulated to discourage the pathogens that cause damping off and mold, which garden soil already carries in spades.
I learned that last part the hard way one spring when I ran out of mix and filled a flat with soil from my raised bed instead. The seeds sprouted, then collapsed within days, taken out by some fungus or bacteria I could not see. The problem was not nutrition; garden soil actually has more of that. The problem was the diseases, weed seeds, and insects already living in it, plus the heavier texture that held water too long around fragile new roots. Potting mix is better than garden soil for this, but still a bit dense for tiny seeds. A dedicated seed starting mix, fresh from the bag, is the safer bet for getting more of your seeds to survive that first vulnerable week.
Scarification

Some seeds carry armor that water simply cannot breach. Morning glory was the one that taught me this. The first year I sowed them straight into the ground, almost nothing came up. The following spring, I nicked the seed coat with a sharp knife before planting, and the difference was immediate: sprouts appeared in days instead of weeks.
Scarification means physically weakening that hard outer shell so moisture can reach the embryo inside. For morning glory and similarly tough-coated seeds like nasturtium or four o’clocks, you have two reliable approaches. A small knife lets you make a shallow cut, just enough to break the surface without damaging what lies beneath. Sandpaper works too: rub the seed between two sheets until the glossy coat dulls. Either method creates the entry point water needs.
After scarifying, soak the seeds for up to 24 hours, then sow promptly while they are still damp. Let them dry out, and you are back where you started.
Heat mats
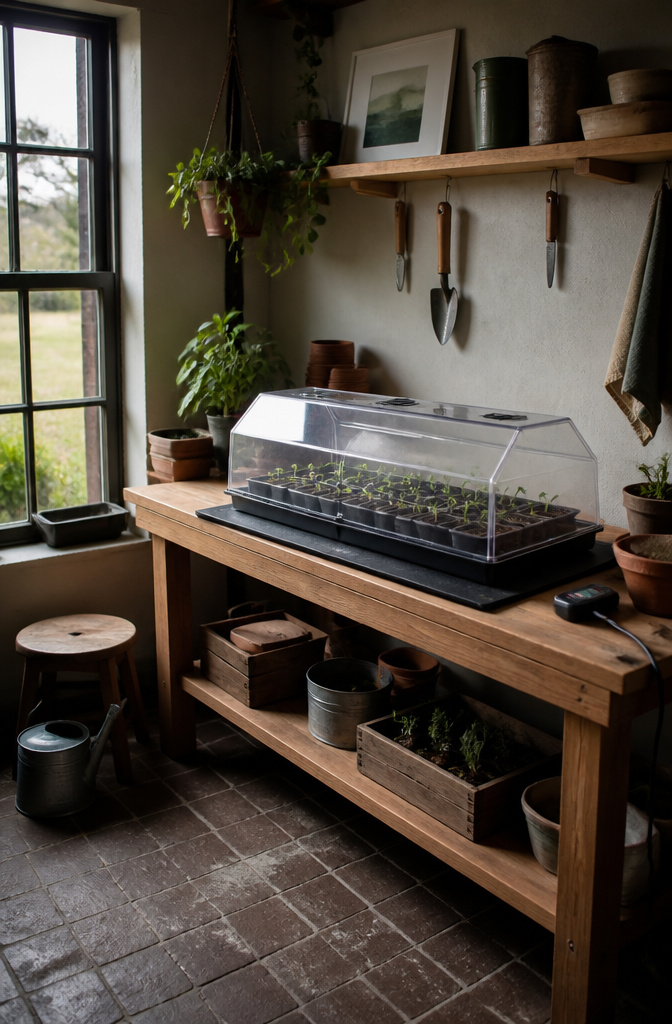
Warm-season crops like tomatoes, peppers, and eggplant sit in cold soil and do nothing for weeks. A heat mat fixes this by holding the soil at 75°F–80°F, the range where most of those seeds actually wake up. Without one, pepper seeds sown three weeks earlier can look identical to seeds started a week ago with bottom heat.
I run mine through a thermostat, not the dial on the mat itself. The mat surface reads warmer than the soil, so the thermostat probe goes into the actual mix. 68°F at the root zone feels like plenty, but 86°F starts cooking seeds, and the gap between those two is smaller than you’d guess.
The mats matter most for anything you start indoors while the house still drops at night. Wood heat in particular lets rooms swing ten degrees, and that stall adds days to germination. Cool-weather crops like spinach and lettuce don’t want this at all; they germinate fine at 50°F and sulk in the 80s.
For a small garden, the math is tight. A basic seedling heat mat runs about $20–30, and the thermostat doubles that. If you’re starting six tomato plants and a few peppers once a year, a warm spot near a radiator or furnace can get close enough. The mat earns its shelf space once you’re filling multiple trays or starting peppers in February, when no sunny windowsill hits the mark.
Environmental monitoring

A thermometer-hygrometer combo costs about ten dollars and does more than either tool alone. Temperature and humidity swing against each other in ways that catch you off guard if you track only one. Warm air holds more moisture, so a 75°F afternoon at sixty percent humidity can drop to forty percent by midnight as the air cools, even though the actual water in the room never changed. That swing is what shocks seedlings.
I keep the unit at tray level, not up on a shelf where the numbers read prettier. Heat mats warm the soil from below, but the air two inches above the tray can run cooler and drier than the wall thermostat suggests. The sensor sitting right among the domes tells me whether the venting I did at noon left things too dry by evening. Night drops are normal and usually fine, but a ten-degree fall paired with plunging humidity means I need to dial the mat up slightly or move the tray off the cold sill. The tool does not fix anything; it just keeps me from guessing which half of the pair changed.
Beneficial microorganisms

Mycorrhizal fungi do not directly trigger a dormant seed to sprout, but they reshape what happens in the first two weeks after the radicle appears. The fungi colonize young root tissue and extend microscopic filaments that pull phosphorus and minor nutrients from soil the root has not yet reached. A seedling with that head start builds stem thickness faster and survives the stretch between cotyledon reserves and true-leaf photosynthesis.
Mix the inoculant into your final watering before sowing, or dust dry spore powder directly onto the seed surface. I ran a side-by-side last spring with pea seeds, the same batch, same raised bed, same week. One row got water only; the other got a mycorrhizal slurry stirred into the soak. The treated row showed first true leaves four to six days earlier, and by the time I thinned, the stems were visibly sturdier. The untreated row caught up eventually, but that early gap matters if your season is short or your weather turns hot fast.
Other bacterial inoculants, like rhizobia for legumes, work on the same principle: partner the root early, feed the plant before it can feed itself. The cost is modest, a few dollars per packet, and the application takes only the extra minute of mixing or dusting. For peas, beans, corn, and squash, the payoff is measurable enough that I now treat it as standard practice, not an experiment.
Hydrogen peroxide soak

A diluted hydrogen peroxide soak sits somewhere between garden-lore trick and legitimate tool, and I spent a season figuring out which side it falls on. The ratio that produced results for me was one tablespoon of standard 3% hydrogen peroxide in a cup of water, with seeds soaked for twelve hours before planting. I learned the method from an older neighbor who swore by it for her morning glories, which always rotted before they sprouted in our wet springs.
I have tried it since on nasturtiums, sweet peas, and a stubborn batch of perennial delphinium seeds that had failed two years running. The nasturtiums and sweet peas popped faster than my control group by about three days, though both sets germinated eventually. The delphiniums, which I had nearly given up on, went from zero to about sixty percent success, enough that I finally got the row I wanted along the fence.
The mechanism is simple enough: hydrogen peroxide kills surface mold and bacteria that attack the seed before it can break dormancy, and the extra oxygen molecule supposedly softens the seed coat. I am skeptical about that second claim, but the disinfection part I have seen work. The risk is leaving seeds in too long or using too strong a mix, which can bleach or damage them. Twelve hours at the dilution above has been my safe window.
Epsom salt in starting water

Epsom salt adds magnesium and sulfur, two nutrients that help build stronger cell walls in the earliest stages of growth. The sulfur gets depleted during germination, so replacing it seems to help seedlings push through faster. I dissolve one tablespoon in a gallon of water and use that as the starting soak or first watering after planting. The same ratio works if you prefer to add it directly to each hole before dropping the seed in.
I tried this on tomato and pepper starts last spring because both crops are known to benefit from magnesium once they are established. The germination rate looked about the same as my control tray, though the seedlings did seem sturdier at the two-leaf stage. That could have been the Epsom salt, or it could have been light and timing. One garden writer I trust swears by it; university extension pages mostly stay quiet on the topic for seeds specifically, focusing instead on mature plants. For a few dollars a bag it is a cheap experiment, but it is not the first place I would spend money if germination is running low.
Warm germination methods

The Instant Pot yogurt setting has become a favorite shortcut for gardeners who want to speed up germination without buying a heat mat. The method is simple: set the pot to yogurt mode while you moisten paper towels until they feel damp but not dripping. Wrap your seeds in the towels, seal them inside a zipper bag, and place the bag directly in the pot. For seeds that prefer cooler germination temperatures, the closed lid alone gives off enough warmth; rest the bag on top instead of inside.
I have not tried this myself. My kitchen counter space is already claimed by actual cooking, and the idea of cycling a pressure cooker between dinner and daisies feels like a scheduling conflict waiting to happen. If you do use it, keep the bag off the bottom heating element and check daily for mold; the warm, humid environment that wakes up seeds does the same for fungi. Paper towel germination itself is worth the effort even without the gadget, especially for older seeds or an untested brand. A damp towel in any sealed container lets you confirm viability before you commit potting soil and weeks of waiting.
Seeds that need cold stratification

Milkweed and echinacea sit on most garden-center shelves without any warning that they will not sprout until they have been through winter. I learned this after two flats of purple coneflower sat in warm soil for six weeks and did nothing. The seeds were not dead; they were waiting for cold.
Cold stratification mimics the freeze-thaw cycle that breaks dormancy in native perennials. Lavender, black-eyed Susan, and most wildflowers from temperate climates need this signal. Without it, germination can stretch across months or fail completely.
The refrigerator method is straightforward. Soak the seeds for a few hours, then nestle them in barely damp seed-starting mix or a wrung-out paper towel inside a sealed container. Tuck the container in a back corner where the temperature stays steady, around 34 to 41 °F. Check every week for mold or early sprouting. Most native perennials need four to twelve weeks of this cold, though the exact window varies by species and by how cold your winter actually gets. I start checking labels in January and count backward from my last frost date.
Common germination failures

Most failed germination comes down to three things: wrong light, cold soil, or uneven moisture. The last one cost me an entire flat of tomatoes two springs ago.
I had the heat mat running, the grow lights on a timer, and I was watering daily. The seeds still stalled at the swollen stage and rotted. I blamed the seed company until I read that consistent moisture means the soil stays damp all the way through, not just the top inch where my spray bottle reached. Once I switched to bottom watering and covered the trays with humidity domes, the same batch of seeds from the same packet germinated in four days.
Light trips people up because the need changes fast. Seeds themselves do not need sunlight to sprout; darkness is fine for germination. The trouble starts when seedlings break the surface and immediately stretch toward a window that is too far away, or when a heat lamp cooks them because it sits too close. I keep my lights two inches above the soil and raise them as the plants grow.
Soil temperature is the one I misidentified in that tomato failure. The air in my basement was 68°F, so I assumed the soil matched it. A cheap thermometer showed the actual mix was sitting at 61°F, well below the 65–70°F range where most vegetables germinate reliably. Peppers and tomatoes really want 75–85°F. The heat mat was under the tray, but the thermostat was set for air temperature, not soil temperature. Moving the probe into the soil itself fixed the gap between what I thought was happening and what the seeds actually felt.
Frequently Asked Questions
Do seeds need light to germinate?
No. Nearly all seeds germinate fine in complete darkness, which is why you bury them at a depth of about one seed diameter. The sprout only needs light after it breaks the surface and begins to photosynthesize. Lettuce and a handful of flowers like petunias and snapdragons are exceptions; those need light and should sit right on the soil surface.
How long should seeds be soaked before planting?
Most seeds do best with an 8 to 12 hour soak in warm water around 75°F. Go past 12 hours and seeds risk splitting or fermenting, especially in a warm kitchen. Small seeds like lettuce and basil are the exception; they clump when wet and become nearly impossible to sow evenly, so skip soaking for those.
What temperature is best for seed germination?
Most seeds germinate best between 65°F and 85°F, though the ideal range splits by crop type. Warm-season crops like tomatoes, peppers, and eggplant want 70°F to 85°F, while cool-season crops such as lettuce, spinach, and peas will sprout in soil as cool as 45°F to 50°F. Soil temperature matters more than air temperature, and the soil can run 5°F cooler than the room around it.
What are the common causes of seed germination failure?
The three biggest causes are wrong light, cold soil, and uneven moisture. Incorrect seeding depth, too much or too little water, compacted soil cutting off oxygen, old or poorly stored seeds, and pest damage also kill germination. A single failure often traces back to one of the big three: a heat mat set to air temperature instead of soil temperature, a spray bottle that only wets the top inch, or lettuce buried like a bean seed.